In a previous post, we discussed the top 5 deployment tools for AWS. Out of them, AWS CodeDeploy is a tool which is especially designed for AWS. It is a new service by Amazon Web Services which was launched during the Re:Invent 2014 conference held in Las Vegas last November. The primary focus of AWS CodeDeploy is to automate the deployment process, minimize downtime, easy adoption, and centralized control.
In this post, we will see how you can leverage AWS CodeDeploy to deploy your latest application code to your EC2 instances. AWS CodeDeploy deploys applications from Amazon S3 or GitHub. We will focus on deploying the application using Amazon S3 here.
Before starting, please go through the terminology used across this post which is specific to AWS CodeDeploy:
Operating System: Amazon Linux 2014.09.1
Application Type: Simple HTML, CSS, JS application
Region: N. Virginia (us-east-1)
We need to have two IAM roles: a Service Role and an Instance Profile Role.
Service Role: Service Role access will be granted to AWS CodeDeploy to read through your EC2 instance tags. For auto-scaled instances, it looks for your autoscaling name tags. Service Role Policy is as follows:
{
"Version": "2012-10-17",
"Statement": [
   {
     "Action": [
       "autoscaling:PutLifecycleHook",
       "autoscaling:DeleteLifecycleHook",
       "autoscaling:RecordLifecycleActionHeartbeat",
       "autoscaling:CompleteLifecycleAction",
       "autoscaling:DescribeAutoscalingGroups",
       "autoscaling:PutInstanceInStandby",
       "autoscaling:PutInstanceInService",
       "ec2:Describe*"
     ],
     "Effect": "Allow",
     "Resource": "*"
   }
]
}
Once the IAM role is created, you need to establish a trusted relationship for this role with AWSCodeDeploy. Modify trust relationship policy for this particular role and set it to below mentioned policy :
{
"Version": "2012-10-17",
"Statement": [
    {
    "Sid": "",
    "Effect": "Allow",
    "Principal": {
    "Service": [
        "codedeploy.us-east-1.amazonaws.com",
        "codedeploy.us-west-2.amazonaws.com"
    ]
    },
    "Action": "sts:AssumeRole"
    }
]
}
Instance Profile Role: EC2 instances needs to be launched with proper permissions to access files from S3 buckets.
{
    "Version": "2012-10-17",
    "Statement": [
    {
        "Action": [
            "s3:Get*",
            "s3:List*"
        ],
        "Effect": "Allow",
        "Resource": "*"
    }
    ]
} To build a deployment revision for S3, you need to create a compressed archive file with your application code and an application specification file (AppSpec). AppSpec is the heart of CodeDeploy and is written in YAML. AppSpec defines how the application code will be deployed on deployment targets and which deployment lifecycle event hooks to run in response to various deployment lifecycle events. It should be in the root of an application source code’s directory structure.
High-Level Structure of AppSpec File:
version: 0.0
os: operating-system-name
files: source-destination-files-mappings
permissions: permissions-specifications
hooks: deployment-lifecycle-event-mappings
In the structure above, you can find the following fields:
Version: the version of your application
OS: Operating system of your deployment targets, i.e.: Linux or Windows
Files: name of the files copied to the deployment target
Permissions: how permissions are applied to files copied to the deployment target
Hooks: scripts to run at specific deployment lifecycle events during the deployment. The available event hooks are:
The sample AppSpec File used for this example deployment is as below:
version: 0.0
os: linux
files:
   - source: /
     destination: /var/www/html
permissions:
   - object: /var/www/html
     pattern: "**"
     owner: apache
     group: apache
     mode: 755
     type:
       - file
hooks:
   BeforeInstall:
   - location: Scripts/installapache.sh
     runas: root
   - location: Scripts/startapache.sh
     runas: root
   AfterInstall:
   - location: Scripts/restartapache.sh
     runas: root
The Sample AWSCodeDeploy application used for this blog post is available over here.
1. Launch an EC2 instance with the Instance Profile role created before, a tag that you like (e.g. Environment = Production or Name = CodeDeployDemo) and with the following user data :
sudo yum update
sudo yum install aws-cli
cd /home/ec2-user
aws s3 cp s3://aws-codedeploy-us-east-1/latest/install . --region us-east-1
chmod +x ./install
sudo ./install auto
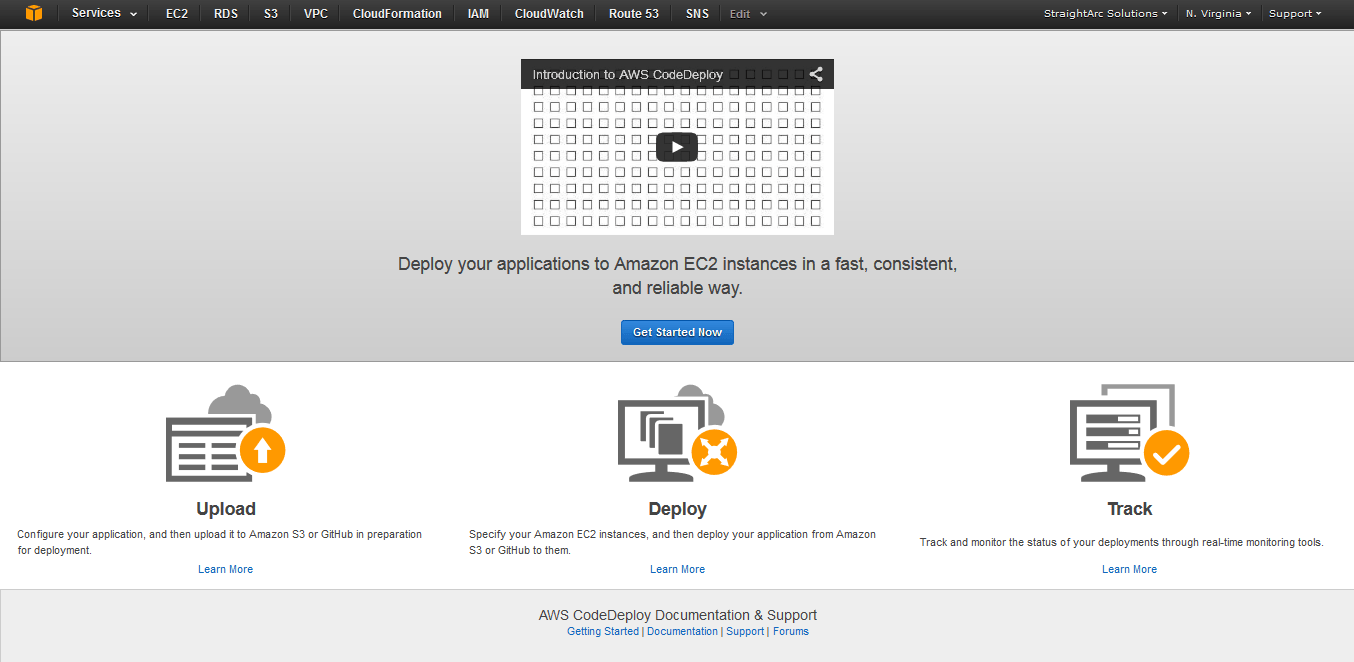
2. Go back to the AWS Management Console and select the “CodeDeploy” service.
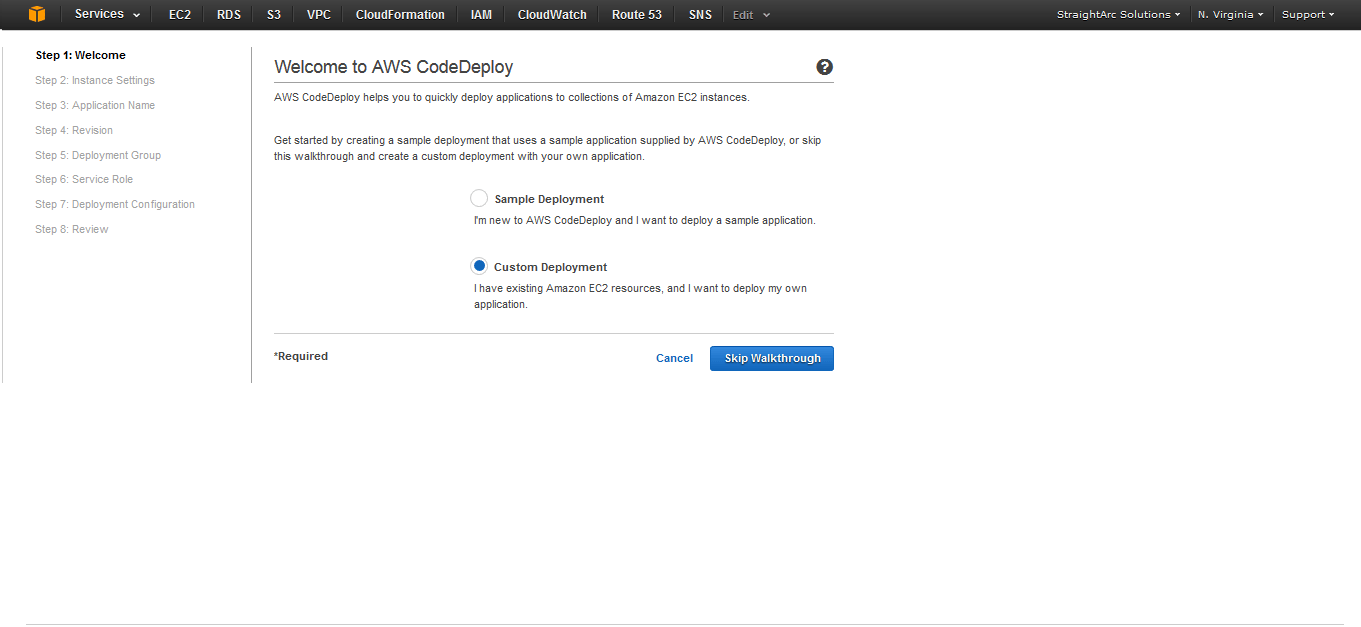
Click on Get Started Now to create your first application and deployment group. It provides you two options:
We will pick with the Custom Deployment model.
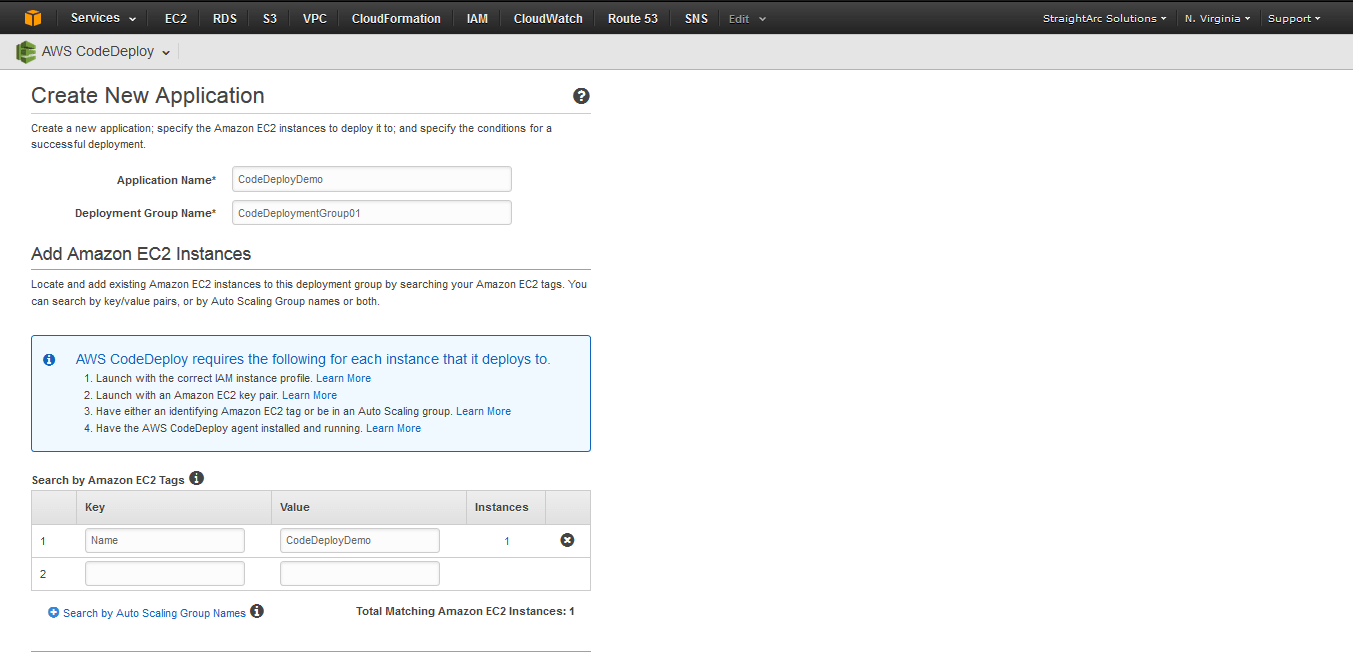
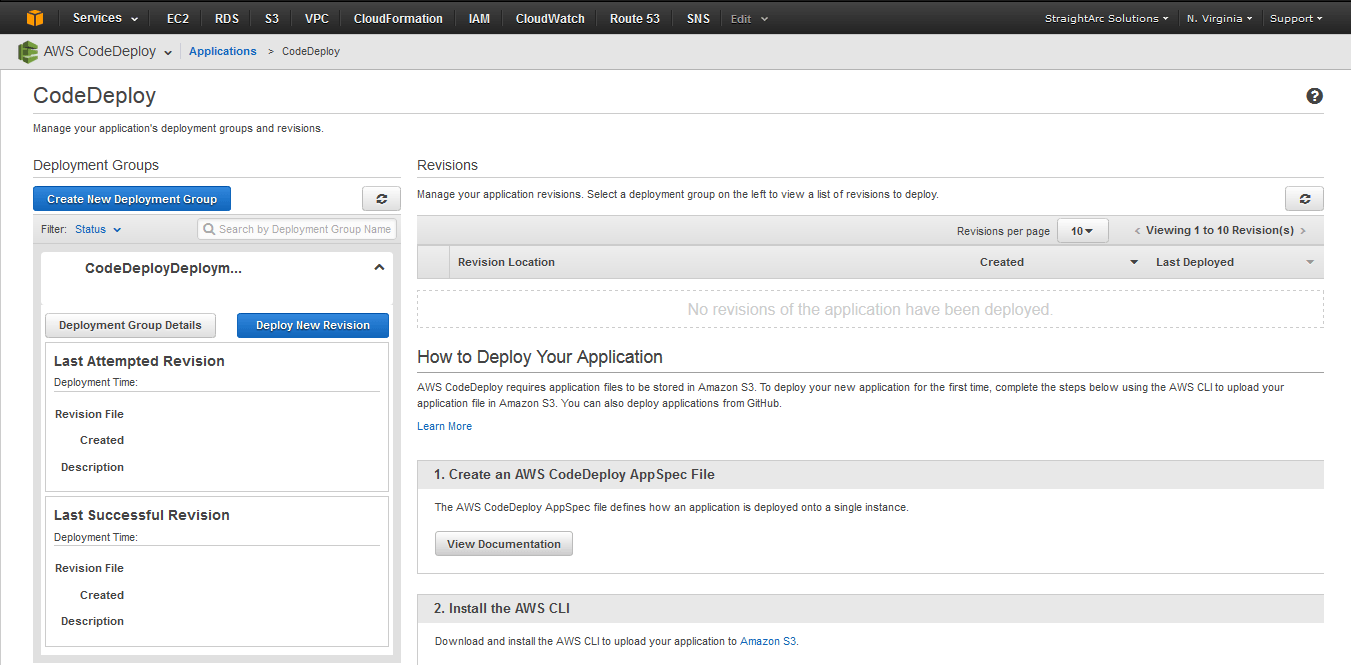
3. Create your application
A CodeDeploy application helps you to create deployment groups and to identify deployment targets (EC2 instances) on which a particular revision is applied.
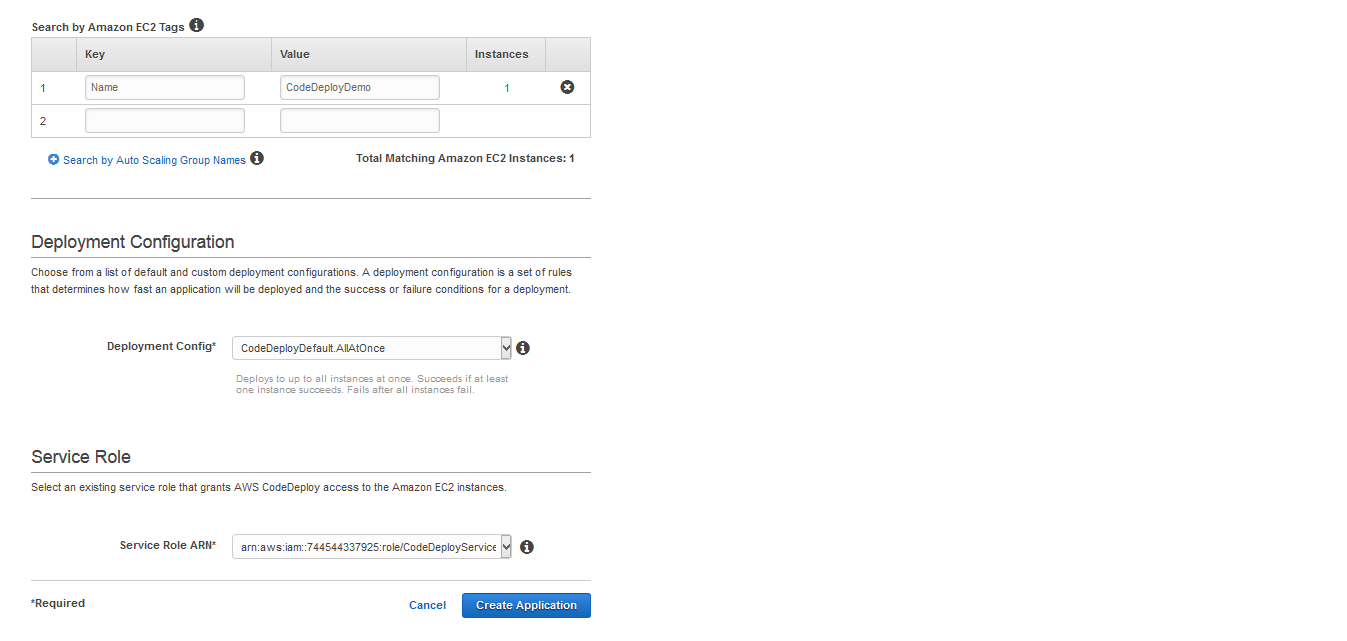
To create an application, you need to provide:
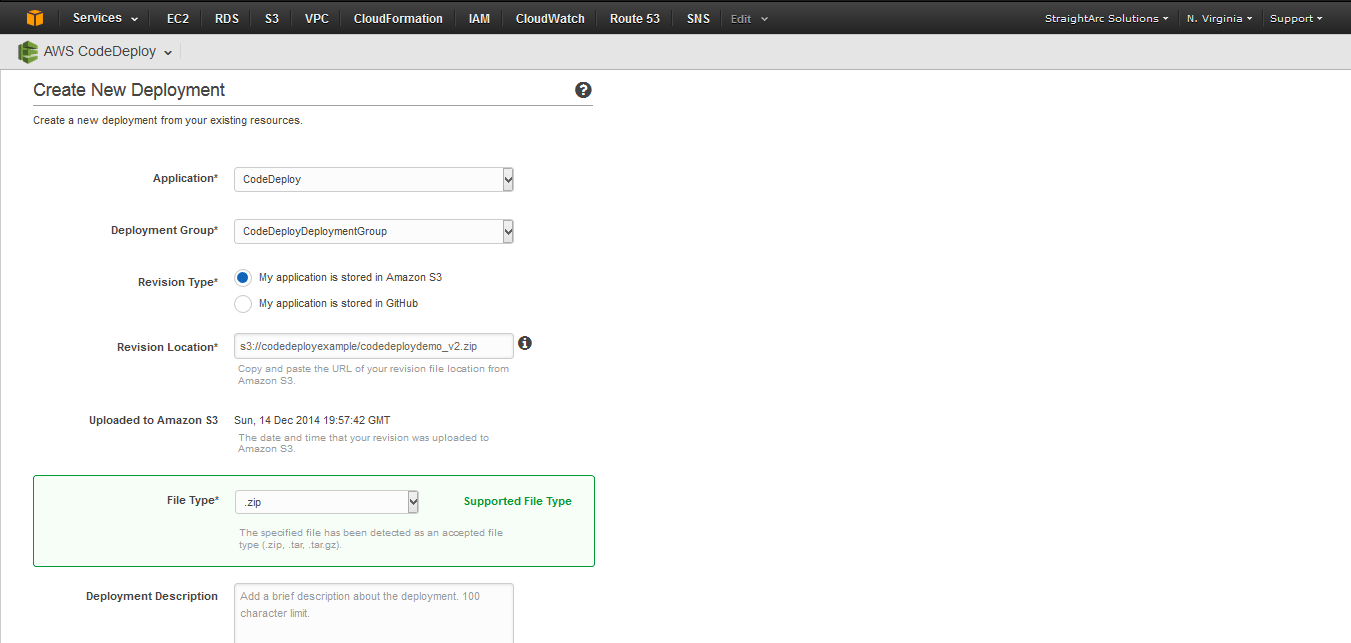
4. Create new deployment
Once the application is created, it is time to create a new deployment which will deploy a revision to deployment targets.
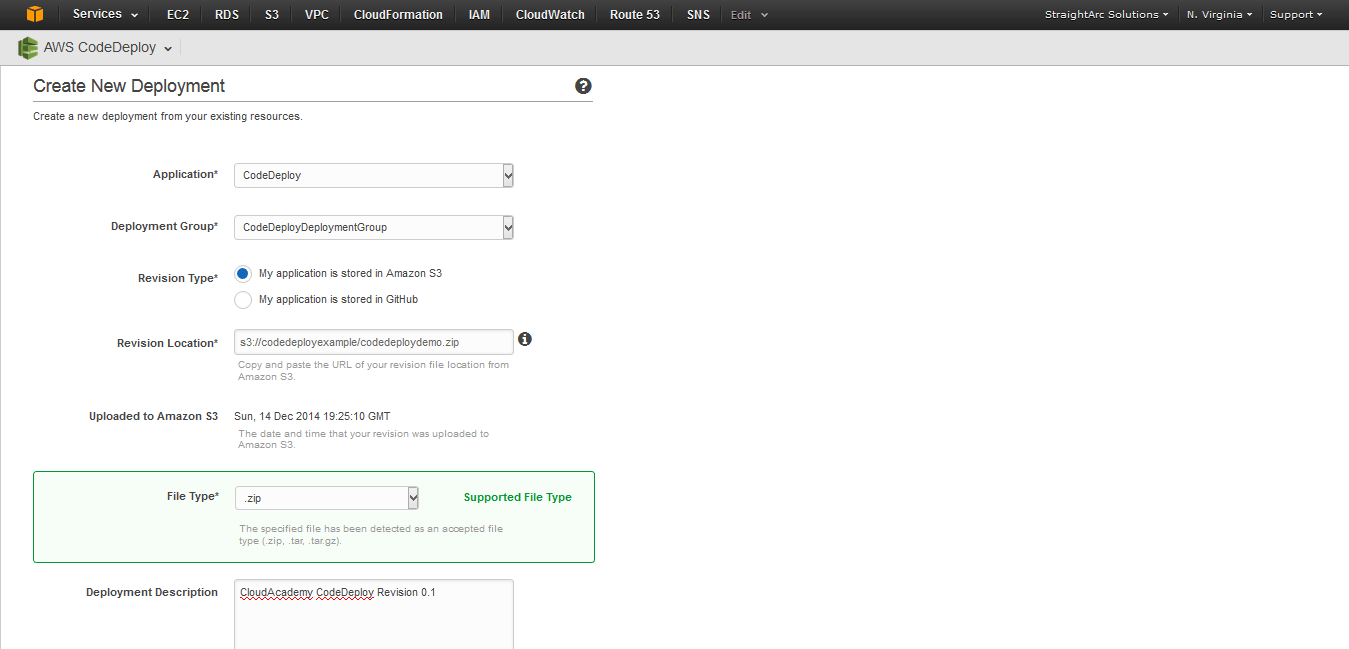
To create a deployment, go to that application and select deploy new revision.
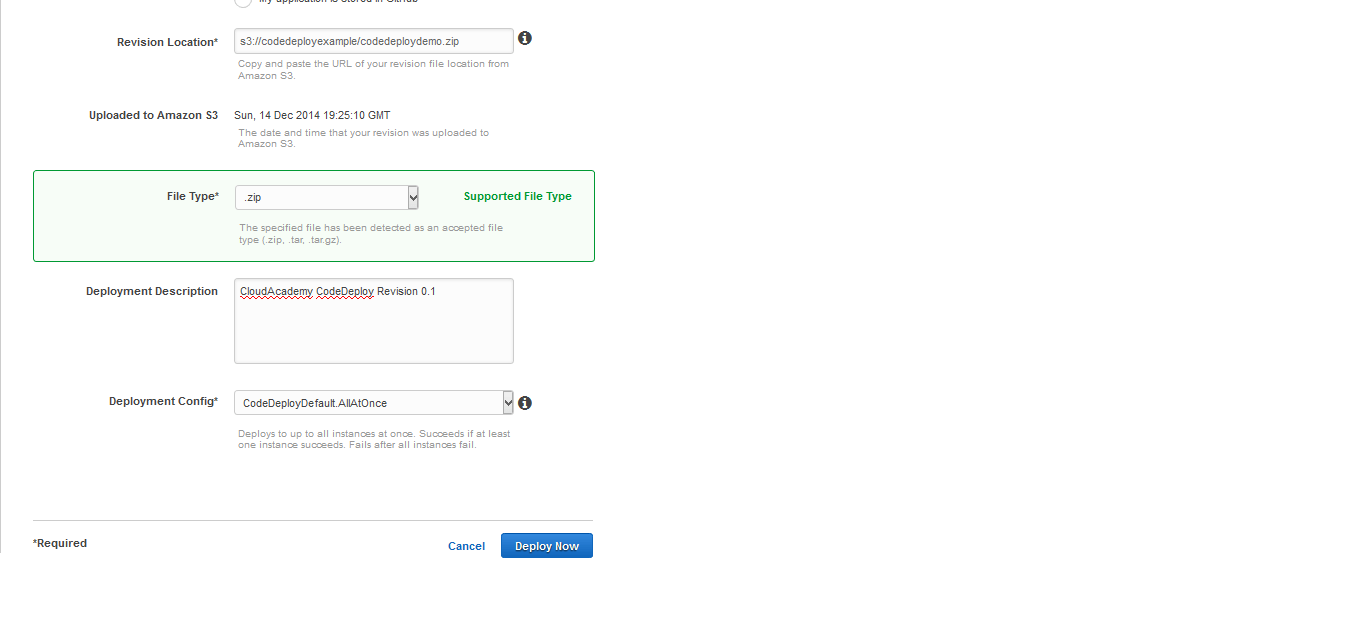
For a new deployment, we need to pass:
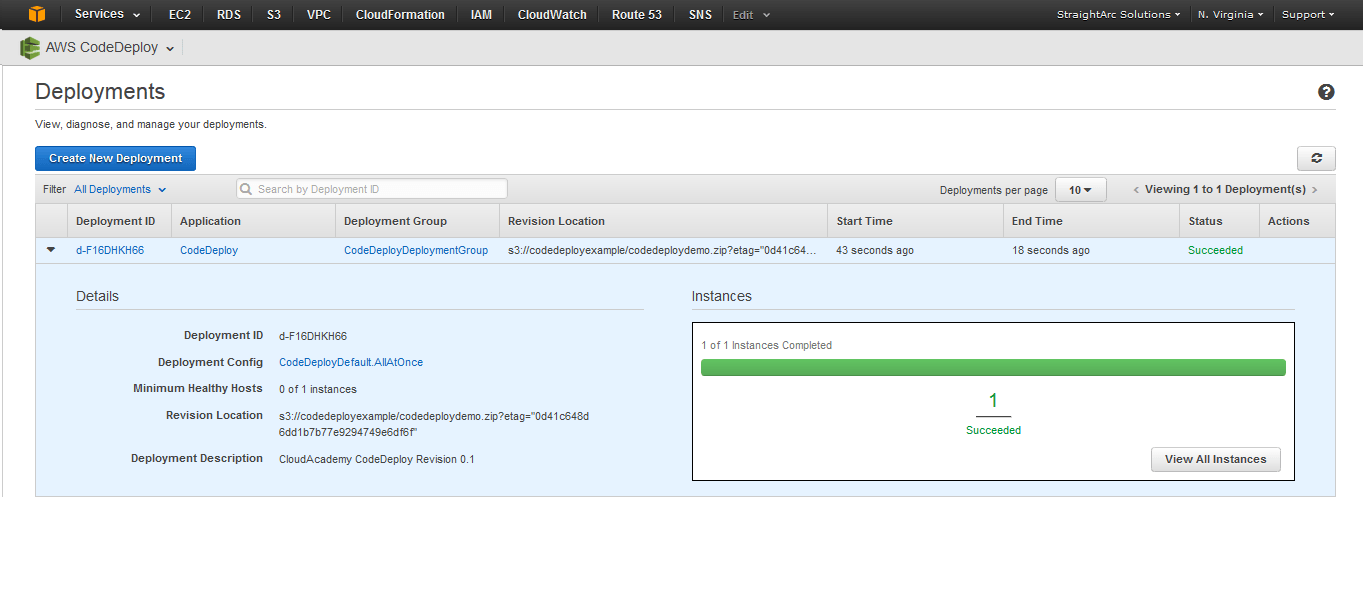
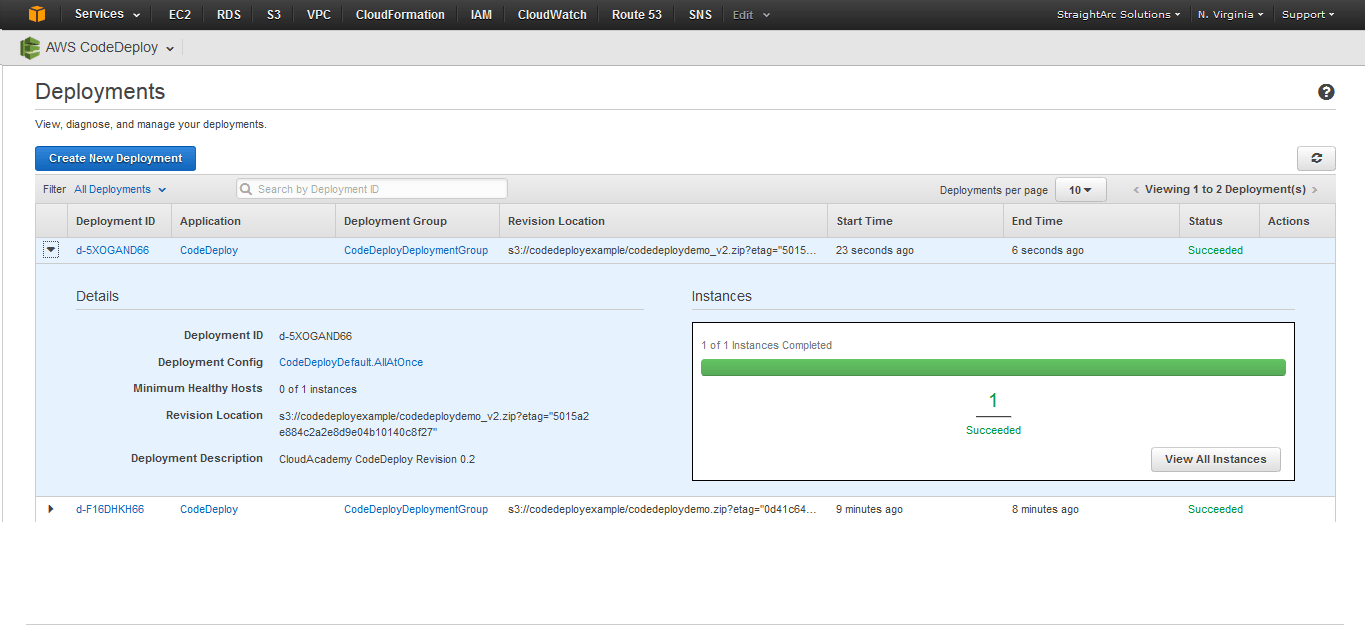
That’s it. Deployment process has started and you can monitor the deployment process on the next screen.
The deployment process goes from Created to In Progress to Succeeded.
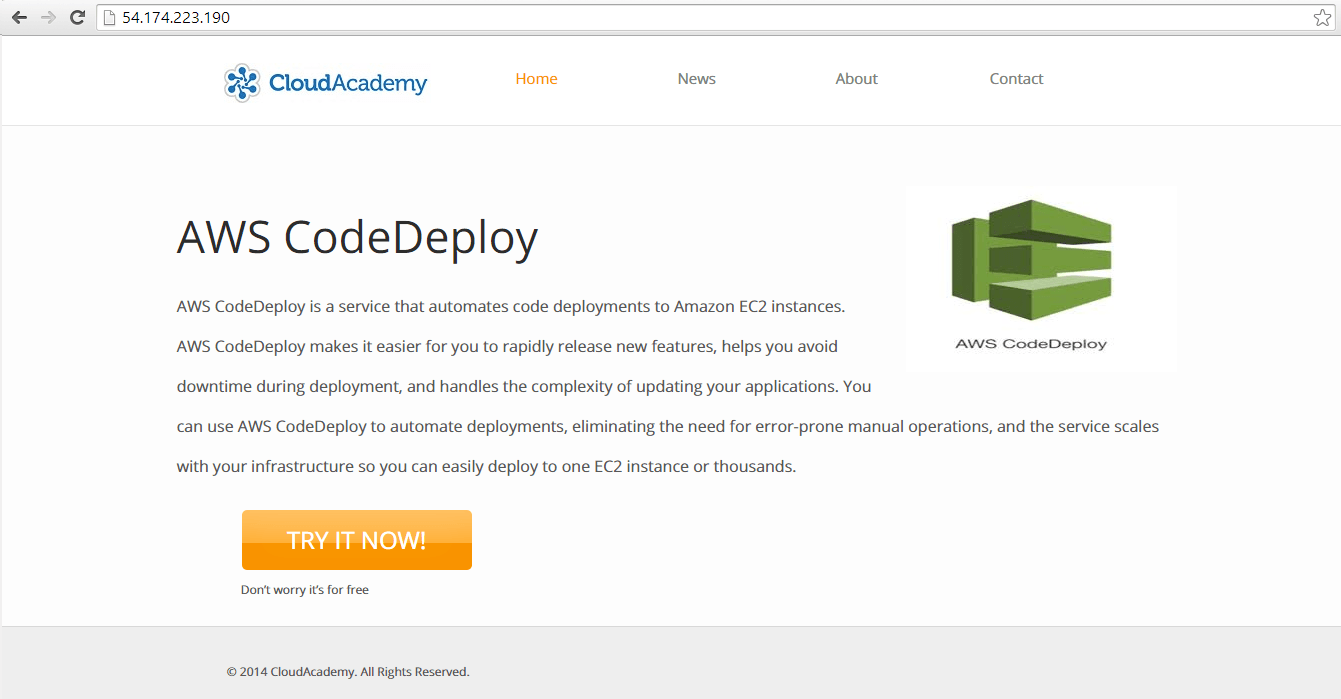
Once the deployment process is completed, you can go back and view your application.
If you used the above application, you will see something like this:
Deploying your latest revision is very easy. All you need to do is to build a compressed archive file (sample new build archive file) and put it into S3 bucket. Once done, go back to your application and create new deployment where you need to pass the latest S3 archive file path as revision location.
A new revision of sample application used for this post is available over here.
Now, initiate the deployment procedure and new application code will be deployed to your instances.
Once done, go back to your browser and browse the application using the public IP address of your instance.
It's Flash Sale time! Get 50% off your first year with Cloud Academy: all access to AWS, Azure, and Cloud…
In this blog post, we're going to answer some questions you might have about the new AWS Certified Data Engineer…
This is my 3rd and final post of this series ‘Navigating the Vocabulary of Gen AI’. If you would like…