![]()
Since most of us work with PDF documents every day, it is important for apps to be capable of supporting PDF files. As an app developer, you might need to support PDF files in your app.
At Cloud Academy, we added the support for PDF documents to our Android and iOS native mobile apps while we were focusing on our big project to achieve feature-parity between our mobile and web platforms. We wanted our users to have the complete experience of our platform — either while using their computers in their homes or on their mobile phones while traveling.
Before considering a custom solution for our PDF reader, we researched the existing third-party solutions, but none of them were appealing or suitable for our app.
In fact, if you don’t want to use a third-party application, you have three options to show these documents inside of your app:
- Use a third-party library (such as the most starred one on GitHub).
- Use a WebView along with a Google Docs link.
- Implement your Pdf Viewer using
PdfRendererfrom the Android SDK.
But which option is the best bet?
Option 1: While using a third-party library could be the easiest solution, most of them bring a lot of native libraries inside our code and increases the APK size (the library I linked adds 16 MB to the size of your APK).
Option 2: This solution is highly unprofessional because you have no control over how to display the document.
Option 3: If you are developing for devices with API ≥ 21, you can easily create a viewer for your document with less than 150 lines of code by using PdfRenderer and a new entry of 2019, ViewPager2.
Based on our testing, we selected option 3. In the article, I’ll explain how we implemented PDF Viewer using PdfRenderer and ViewPager2 in our mobile and web platforms. If you’re not familiar with our training platform, then check out our Programming Learning Paths. Each learning path is loaded with the most up-to-date video-based courses, practice exams, and labs that will push your skills to the next level by building practical, hands-on experience.

ViewPager2: The Return
In November 2019, Google released the first stable version of the new ViewPager2. Apart from that weird feeling of having a number inside the name of a class, the VP2 is now using the RecyclerView components and also brings in a lot of interesting features and improvements, such as:
- Right-to-Left (RTL) support
- Support for vertical paging
- Ability to programmatically scroll the page
- Added MarginPageTransformer and CompositePageTransformer, which allows you to achieve beautiful custom animations for your pages
Of course, there’s much more than this, and I’d strongly suggest you have a look at this article for further information.
One quick note: VP2 is AndroidX only, so if you haven’t migrated to AndroidX yet, this is the best moment to do it.
A brief look at PdfRenderer
PdfRenderer will be our special guest today: This class will accept a FileDescriptor of our PDF document and once initialized, we will be able to render the content of the document, page by page, inside multiple Bitmaps (one for each page). This component is really easy to use, and the official documentation provides a very self-explanatory piece of code that explains how to use it:
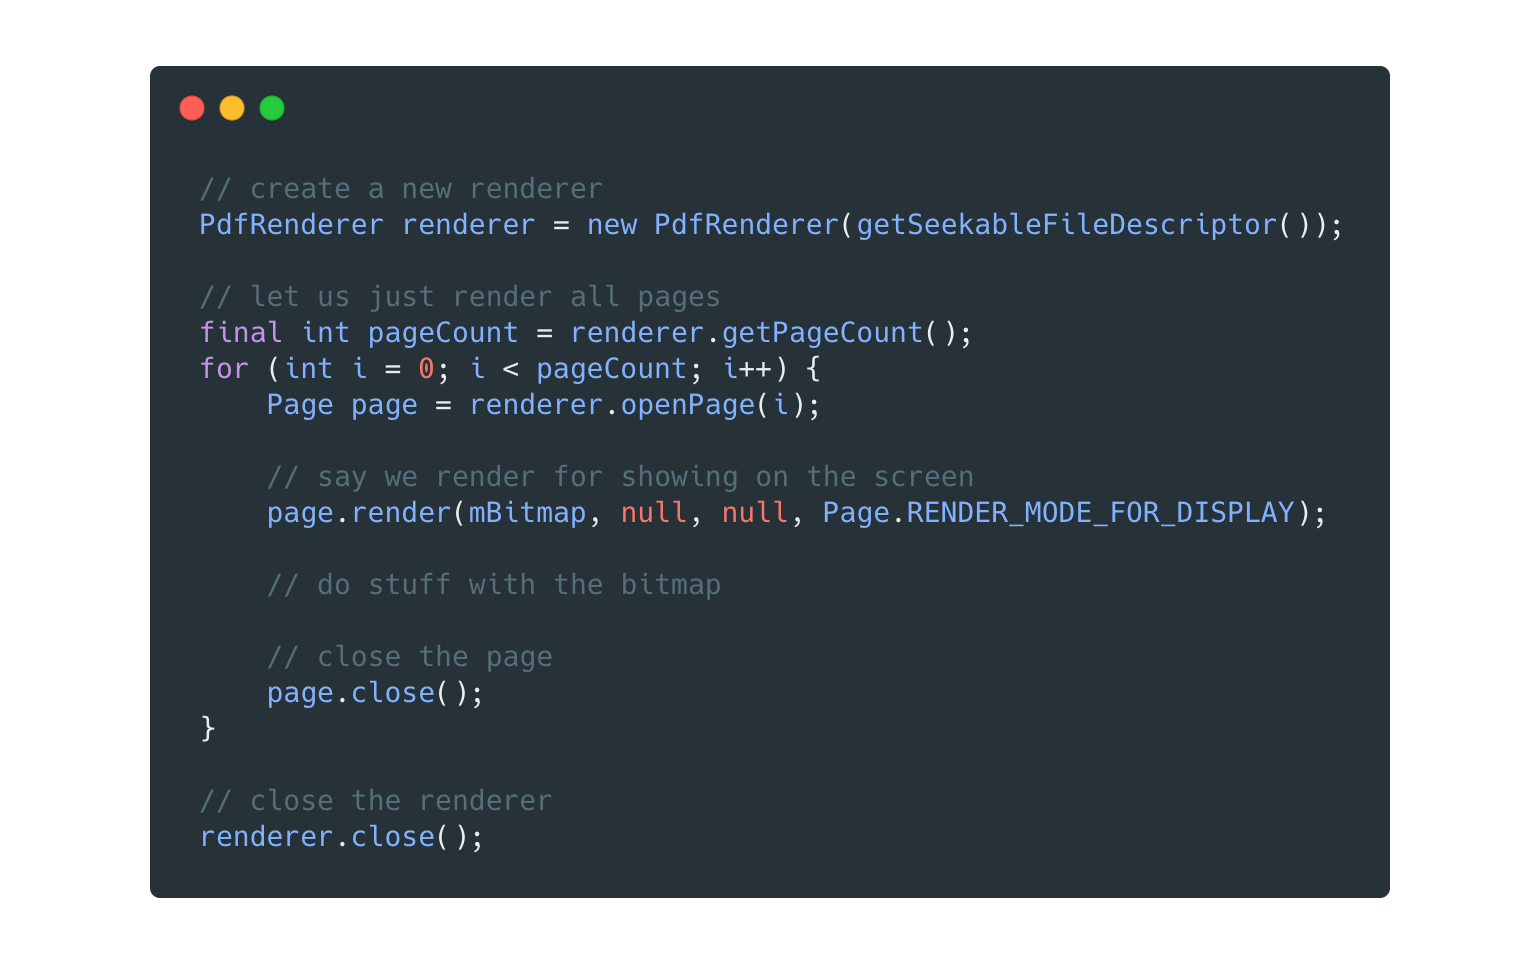
Done. The only things we need to keep in mind are that we can only have one page open at a time and that the class is NOT thread-safe. The magic under the hood is written in native code, so we can assume that the renderer is pretty fast (if we manage the bitmaps correctly; see next).
Let’s get started!
First we are going to implement all the components for our Adapter of the ViewPager, which of course will be a RecyclerView.Adapter subclass.
Let’s start with the layout of a single element. We already know that we need an ImageView to display the rendered page, so we just need to wrap it into a layout and we’re done. I used PhotoView, a custom implementation of ImageView that handles smoothly pinch-to-zoom and double-tap to zoom. 
Now, let’s move on to implementing the adapter. In this implementation, the adapter will have its own PdfRenderer instance that will render each page into a new bitmap and bind it into our ViewHolder. Take a look at the code:
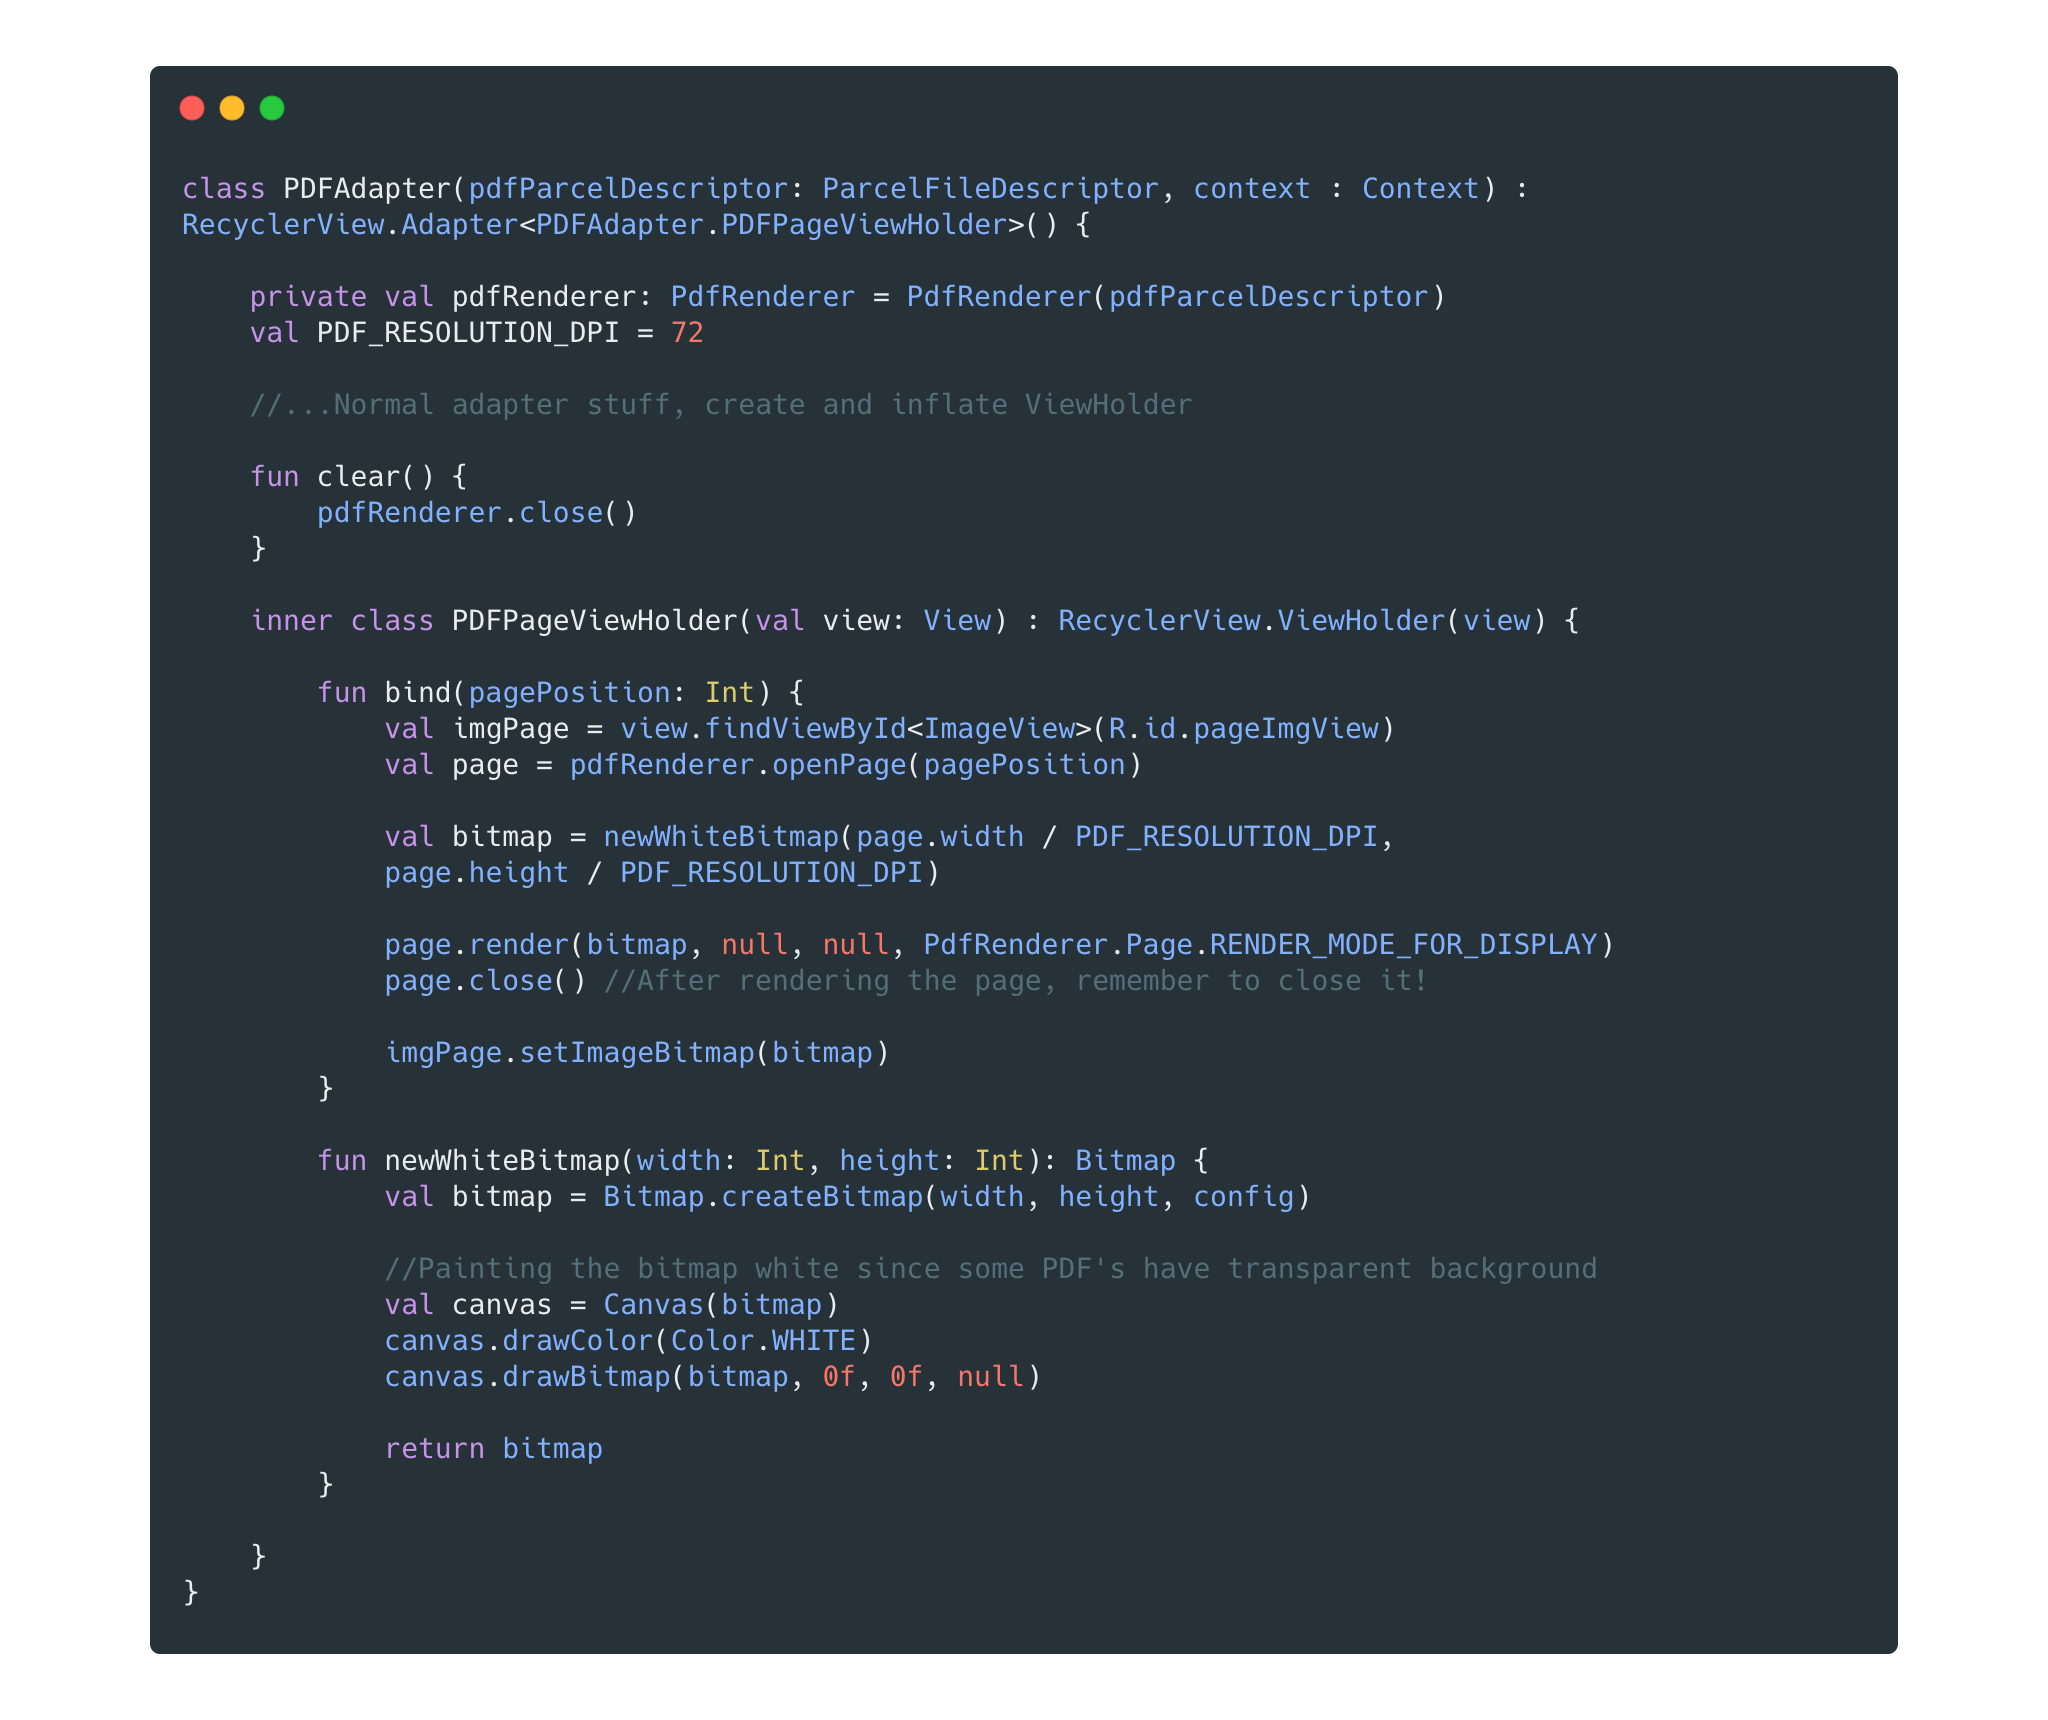
Here’s what the bind method does:
- Takes the index of the current element as a parameter and opens the page
- Calls newWhiteBitmap, which creates a new Bitmap and paints it white
- Renders the page into the bitmap using PdfRenderer’s render method
- Closes the page and sets the bitmap as the source of the ImageView
We are dividing each dimension of the page by PDF_RESOLUTION_DPI since the size returned by Page.getWidth() and Page.getHeight() is in Points. To get the pixel value, we just need to divide the value by 72.
Voilà! You have implemented your PDF Reader.
Well, actually…
If you start the app with the code mentioned above, you will see that while the pages are rendering correctly, the scrolling of the pages looks janky, kind of unresponsive, and not appealing to the user’s eyes.
That’s why every time the RecyclerView loads an item, it needs to execute two heavy operations: creating the bitmap and rendering the PDF page into it. Right now we need to optimize this process to achieve a beautiful smooth scroll between pages.
Creating a bitmap pool
The answer to this problem is very simple: instead of lazily loading the pages one by one, we can have a bitmap pool that, whenever a page is selected, silently preloads the adjacent pages of the current one, so when the user swipes to the next (or previous) page, we just need to return the previously rendered bitmap, ready to be shown to the user.
If you think a bit about this solution, you will recognize that it will be an implementation of a sliding window applied to our list of pages, in which the sliding window will contain the bitmaps of the pre-rendered pages.

Before implementing our bitmap pool, let’s think about the requirements of this component. We will need:
- A data structure that makes it easy to implement a sliding window
- Information about how to construct the Bitmap (spoiler: it will be a
Bitmap.Configobject) - Of course, an instance of
PdfRenderer, which will render the page into a Bitmap
As for the data structure, I initially used a plain old LinkedList to store the pages’ bitmaps, but then I realized that a SparseArray would be a better fit for this problem.
Diving into the BitmapPool
You can take a look at the whole class here, but in the following sections we will go through every core method of the class.
We already saw newWhiteBitmap() in the earlier paragraph, and toPixelDimension() is nothing more than an extension function to convert the measures of the page in order to create a correctly sized bitmap, so let’s focus on the remaining components.
Initializing the BitmapPool
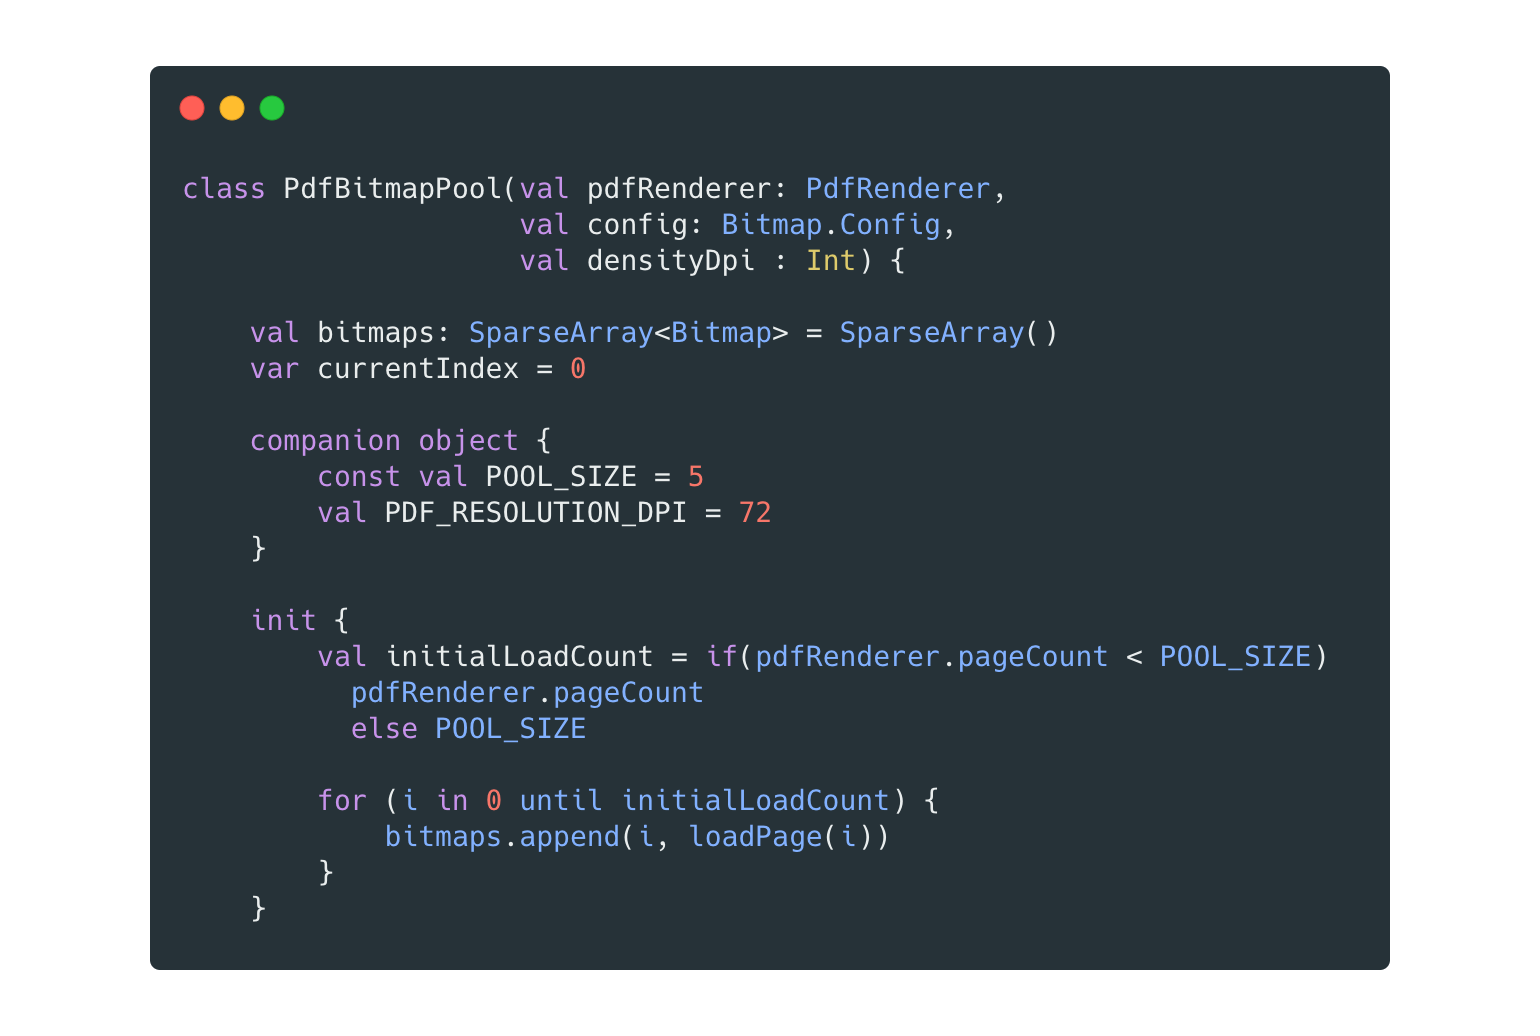
After we initialize our BitmapPool we are going to load the first POOL_SIZE pages, where POOL_SIZE = 5 . This is an arbitrary number one can try to play with, as long as it is an odd number.
Each bitmap is rendered by the loadPage(index: Int) method, which basically loads the page from PDFRenderer, and draws it in a Bitmap generated by newWhiteBitmap() . The bitmaps are then inserted straight away into our SparseArray.
The loadMore() method
The loadMore() method will be in charge of loading the new adjacent pages as the user swipes back and forth between the PDF document.
If you have worked with a RecyclerView before (and I really hope you have), you already know that there’s no guarantee of when, or after how many pages scrolled, this method will be called. That’s why we would need to “recalculate” the sliding window range using the new index, instead of keeping any reference to the old selected page index.
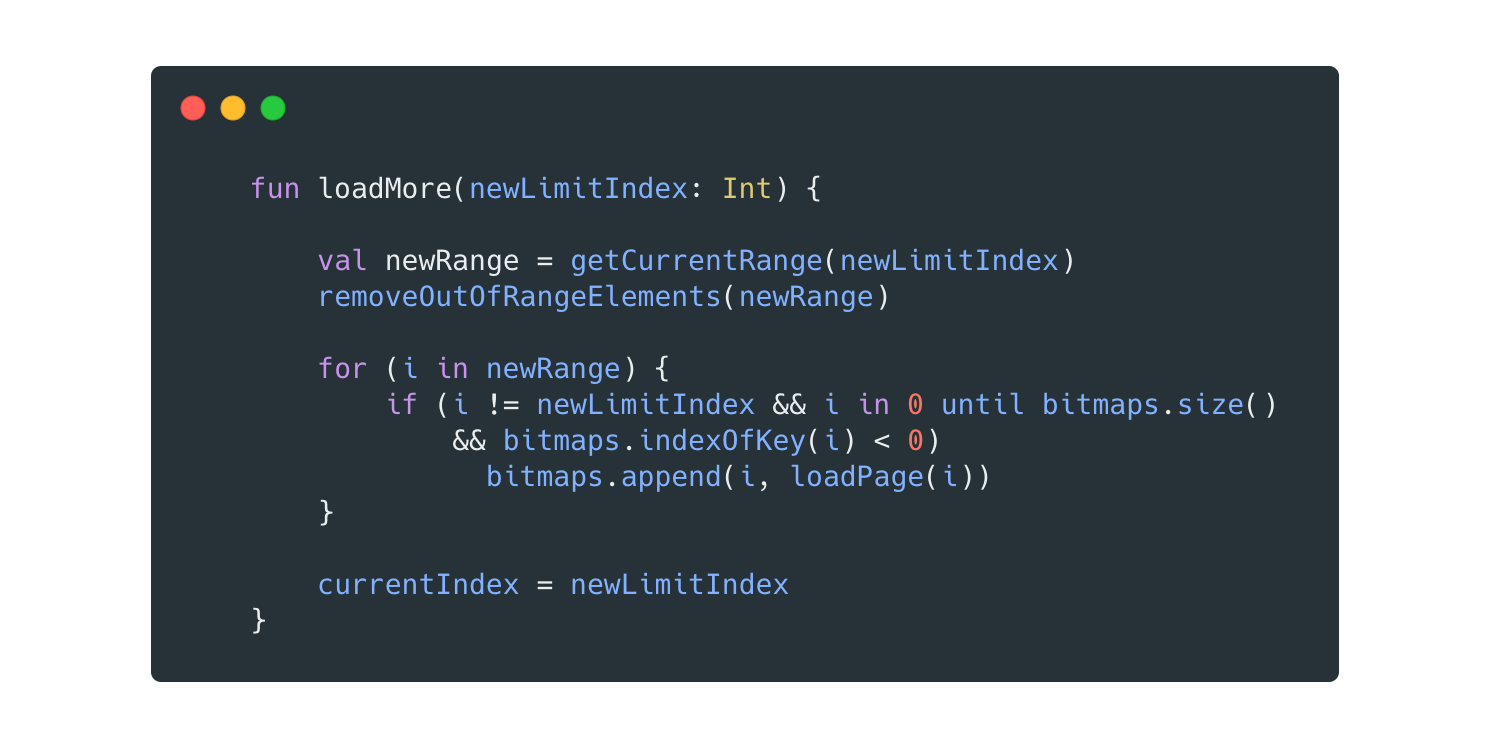
Let’s break it down in three steps:
- The method computes the new “sliding window” range, based on the new index passed as the argument of the function.
- After that, it removes the now out-of-range bitmaps from the SparseArray, freeing up space.
- Finally, it loads and adds into the SparseArray the new pages that weren’t inside the “sliding window” range before, using our beloved
loadPagemethod.
The first point is achieved with getCurrentRange, which basically “moves” the sliding window forward or backward. The method accepts the new index of the page, and recomputes the sequence based on a very simple formula:
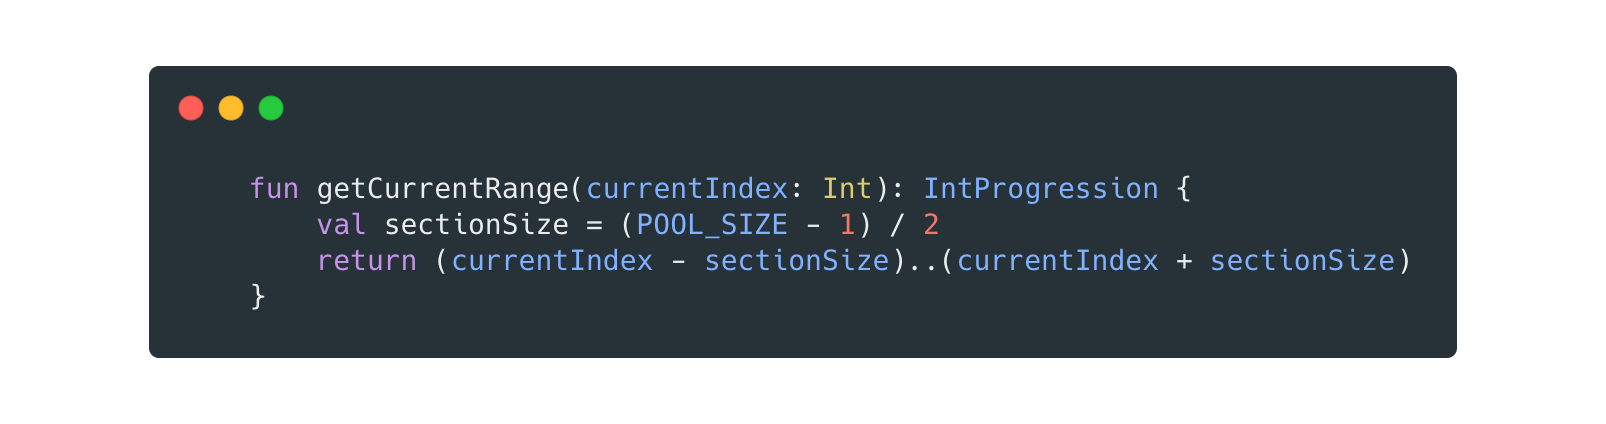
Where sectionSize is basically the number of the adjacent pages to the current index so that would be n = sectionSize adjacent pages both on the left and the right side of the currently selected page.
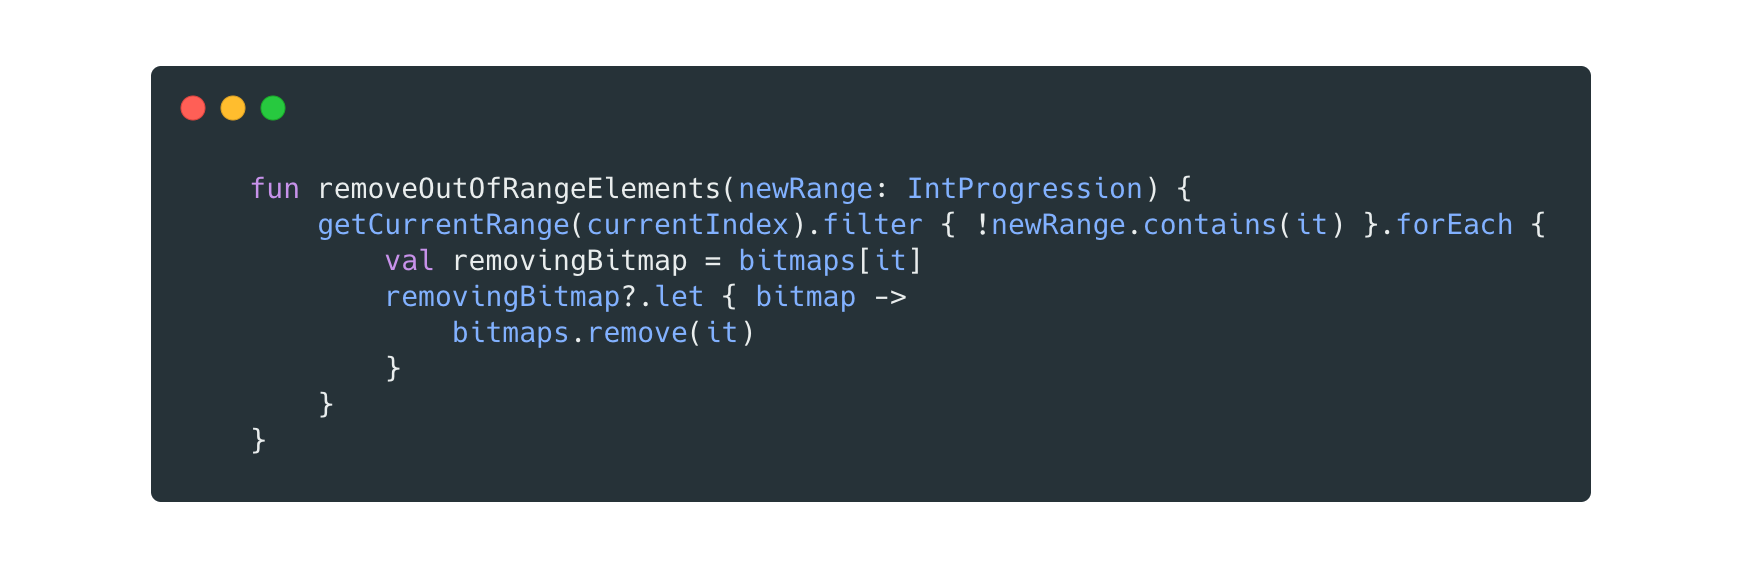
After that, removeOutOfRangeElements(newRange : IntProgression)will take care of cleaning up our SparseArray from all of the bitmaps that are no longer included in the newly computed range.
Lastly, we iterate our SparseArray and check if there are bitmaps at the indexes inside our newly computed range. If there is a bitmap, we know that a page has already been loaded and we can skip that element; if there’s not a bitmap, we will create one using the loadPage method, and then we will add the newly created page inside of the SparseArray.
Done! After this execution of loadMore() , the user can swipe from one page to another without seeing any stutter or lag, and whenever the ViewHolder’s bind method is called, this whole process will start again.
Going back to our adapter, all we need to do in the bind method now is get the reference to the ImageView , set the bitmap corresponding to the current index, and call loadMore() , which will take care of the background loading of the adjacent pages.
Summary
If you want to play with the PDF Viewer and see all the implementation details, check out my small project. If you are curious about what we do at Cloud Academy, check out our mobile apps and our web platform.
A big thanks to Luca Faverio for helping me to shape the implementation of this project.