![]()
(Update) We’ve released some great new content over the past few years, visit Cloud Academy’s Training Library for the latest training material.
In a recent post, we discussed what the POODLE Scans Attack is and how to disable it in Amazon AWS ELB and Cloud Front Services. In this article, we will see how to fix the POODLE on Windows Server 2012 R2. The POODLE Scans Attack is a specific vulnerability of SSLV3.0, so to mitigate this attack we need to disable SSLV3.0 completely.
In Windows Server 2012 R2 the SSL/TLS protocols are controlled by flags in the registry settings. So to disable the SSLV3 we need to edit the registry settings. We need to have Administrator privileges to perform this activity.
Before performing the disabling of POODLE Scan Attack on any device, we need to verify whether hosted domain/host is Vulnerable with respect to POODLE or not.
Vulnerable Domain Non vulnerable domai)


If your domain/URL is shown as vulnerable, the following steps will disable SSL3 and fix the vulnerability:
How to fix POODLE on Windows Server 2012 R2
- Login to Windows Server 2012 R2 and open the Registry Editor running it as administrator:
On the Start screen type regedit.exe.
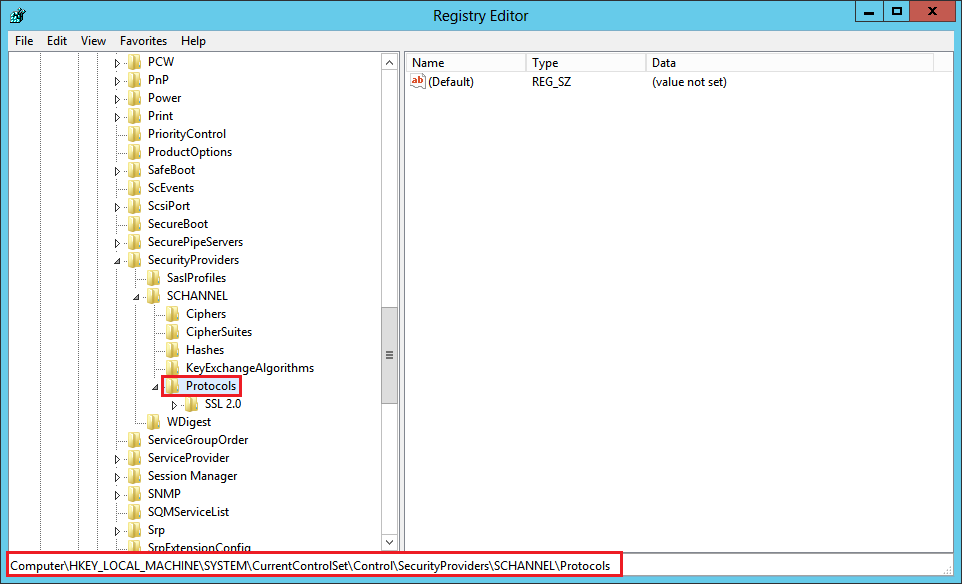
Right-click on regedit.exe and click Run as administrator. - In the Registry Editor window, go to: HKEY_LOCAL_MACHINE\SYSTEM\CurrentControlSet\Control\SecurityProviders\Schannel\Protocols\

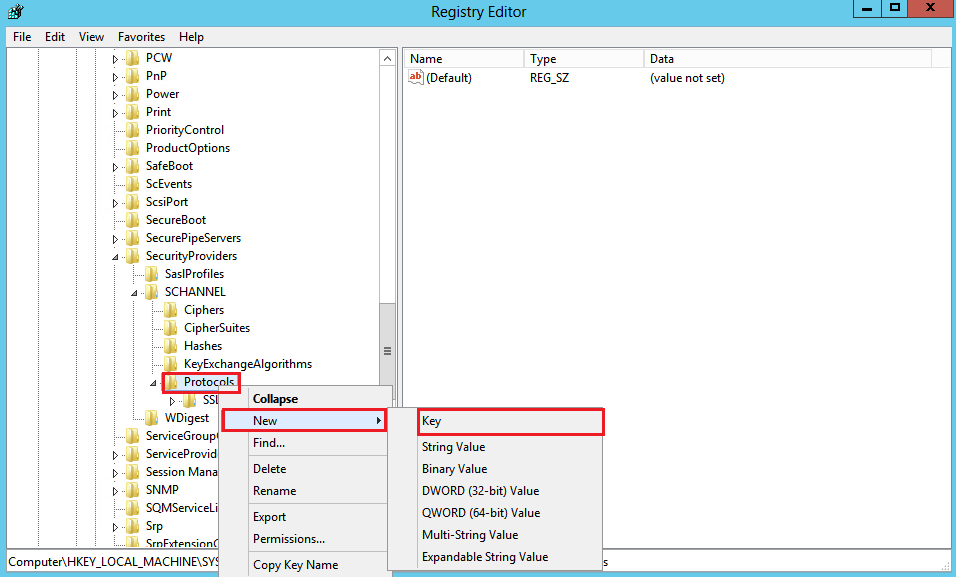
- In the navigation tree, right-click on Protocols, and in the pop-up menu, click New > Key and name the key as SSL 3.0
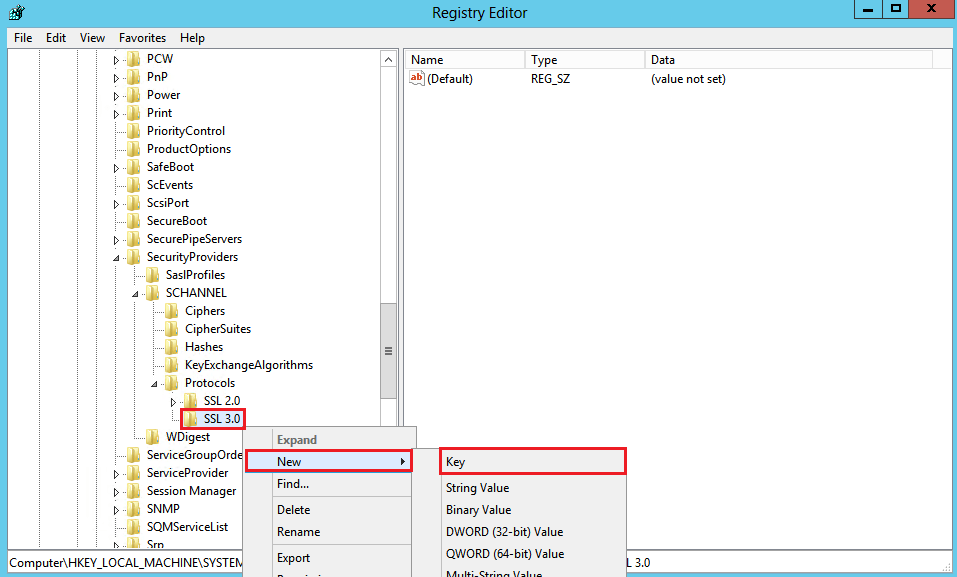
- In the navigation tree, right-click on the new SSL 3.0 key that we have created in the above step, and in the pop-up menu, click New > Key and name the key as Client
- In the navigation tree, right-click again on the SSL 3.0 and in the pop-up menu, click New > Key and name the key as Server
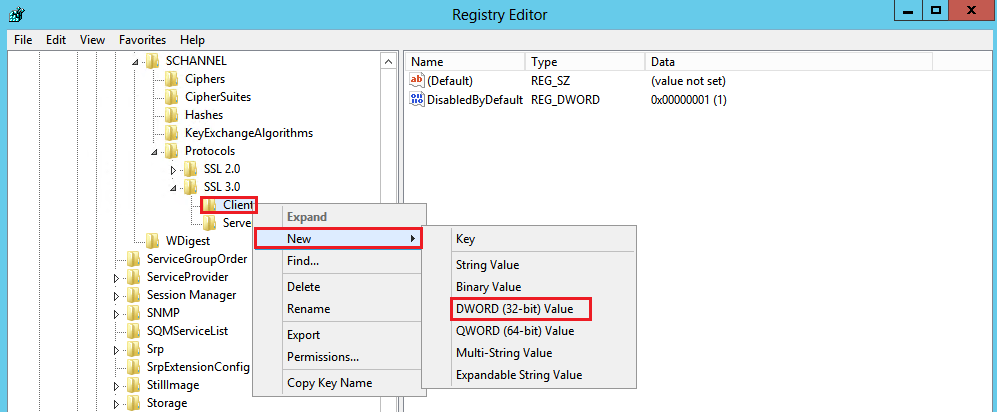
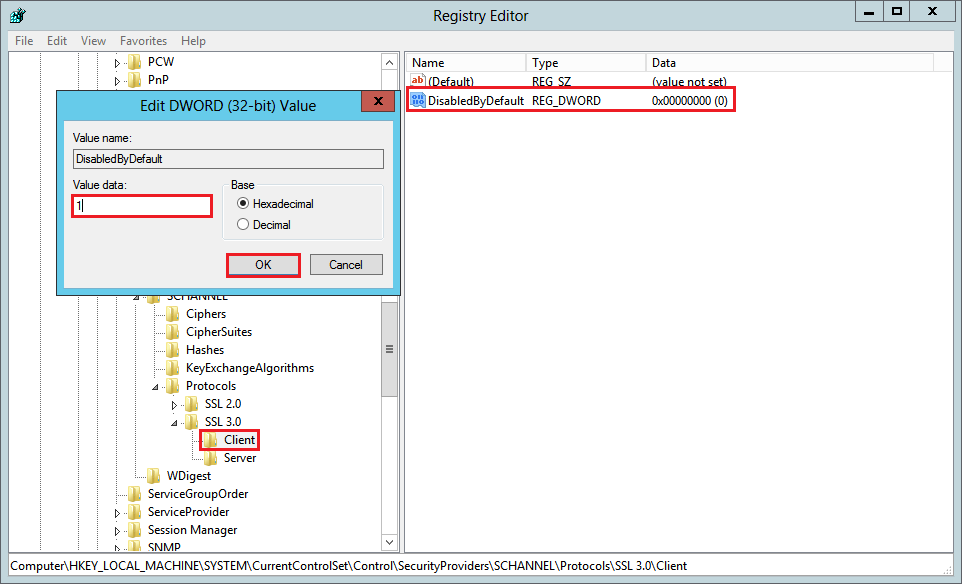
- In the navigation tree, under SSL 3.0, right-click on Client, and in the pop-up menu, click New > DWORD (32-bit) Value
and name the value DisabledByDefault - In the navigation tree, under SSL 3.0, select Client and then, in the right pane, double-click the DisabledByDefault DWORD value. In the Edit DWORD (32-bit) Value window, in the Value Data box change the value to 1 and then, click OK.
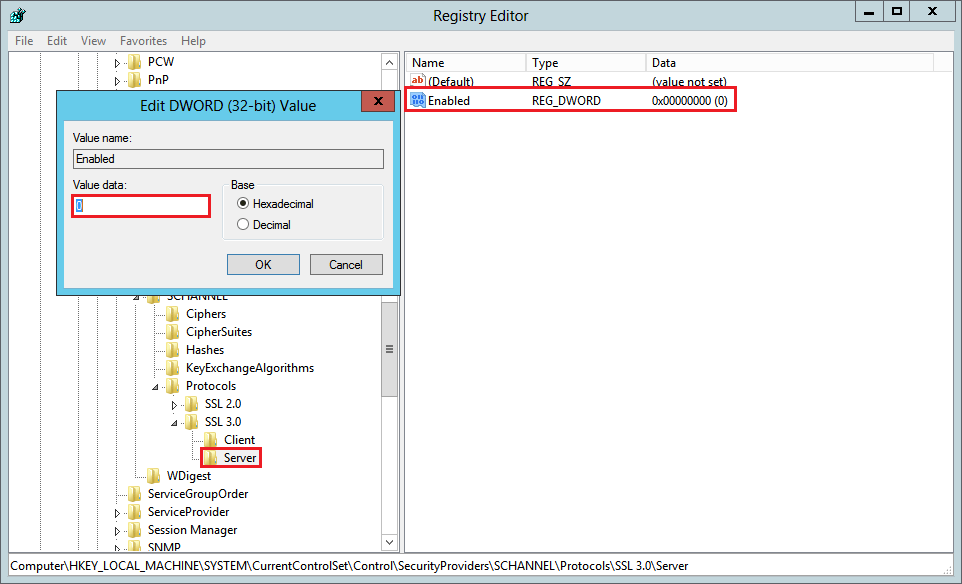
- In the navigation tree, under SSL 3.0, right-click on Server, and in the pop-up menu, click New > DWORD (32-bit) Value and name the value Enabled.
- In the navigation tree, under SSL 3.0, select Server and then, in the right pane, double-click the Enabled DWORD value. In the Edit DWORD (32-bit) Value window, in the Value Data box leave the value at 0 and then, click OK.
- Restart the Windows Server to apply these changes permanently.
After the restart, verify whether your changes have applied successfully by checking your domain again on POODLE Scan Test, and you are done!