When designing a website that will handle sensitive information like users’ private or financial data or sensitive company documents, security has got to be the top priority. Our customers should always feel safe – and actually, be safe – when visiting our site. We’re going to walk through the process of purchasing and then applying SSL certificates on a Linux-based web server.
Why do you need SSL certificates?
Imagine that you are sitting in front of your computer in India and considering placing an order through an e-commerce website hosted in the US. If you decide to complete your transaction, messages containing your personal and credit card information will likely travel across networks in many countries. Without SSL certificates, neither you nor the e-commerce server will have any control over the routes they’ll follow: if your connection is not encrypted, anyone at any point along the route will be able to freely read the contents in plain text.
Once customers figure this out (and that won’t take long), they won’t be back.
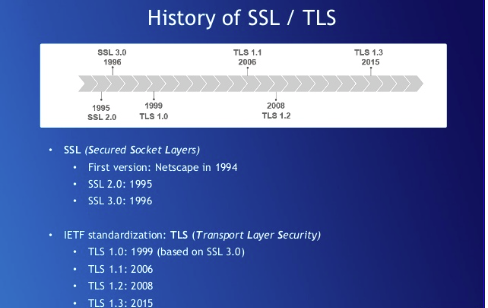
To address concerns about data moving around the web, Netscape (also known for their once-dominant web browser and their still-dominant Javascript) developed the Secure Sockets Layer protocol.


Using the Hypertext Transfer Protocol Secure (HTTPS) for a browser session guarantees that the website you are accessing has been authenticated by a third party Certification Authority (CA). According to the Internet-Draft of the SSL Protocol, SSL is meant “to provide privacy and reliability between two communicating applications.”
An “authority” for SSL certificates is an entity which issues digital SSL certificates to organizations or people after validating them. Certification authorities have to keep detailed records of what they have issued and the information used to issue it and are audited regularly to make sure that they are following defined procedures. Well-known commercial authorities include GeoTrust and GlobalSign. A new free, automated, and reliable Certification Authority called Let’s Encrypt is just now in the process of getting started. They will definitely be worth a look once they’re fully up and running.
How SSL Works
SSL works through a series of quick messages sent back and forth between your browser and the web server.
- A browser attempts to connect to a web site secured with SSL.
- The browser requests that the web server identify itself.
- The server sends the browser a copy of its SSL Certificate.
- The browser checks whether it trusts the SSL Certificate. If so, it sends a message to the server.
- The server sends back a digitally signed acknowledgment to start an SSL encrypted session.
- Encrypted data is shared between the browser.
Purchase and install an SSL certificate
To purchase and properly apply an SSL certificate, you will need to generate a Certificate Signing Request (CSR) for the web server you plan to secure. The CSR contains your certificate-application information.
First, install Open-SSL on your server. This is done through your Linux package manager. For a Distro using RPM, you can install it with yum:
yum install openssl openssl-devel
Now create a RSA key for your Apache server. We are going to place our key in a new directory in our user’s home folder
mkdir ~/domain.com.ssl/
cd ~/domain.com.ssl/
Type the following command to generate a private key and CSR.
openssl genrsa -out ~/domain.com.ssl/domain.com.key 2048
openssl req -new -key ~/domain.com.ssl/domain.com.key -out ~/domain.com.ssl/domain.com.csr
When creating a CSR you must enter the information to be displayed in the certificate. The following characters are not accepted: <>~ ! @ # $ % ^ * / \ ( ) ?.,&
Country Name (2 letter code) [AU]: US
State or Province Name (full name) [Some-State]: California
Locality Name (eg, city) []: Oakland
Organization Name (eg, company) [Internet Widgits Pty Ltd]: MyCompany Ltd
Organizational Unit Name (eg, section) []: IT
Common Name (eg, YOUR name) []: mydomain.com
Email Address []:nitheeshp@outlook.com
Leave the challenge password blank (press enter)
Now, from the web site of the SSL certificates vendor you choose, select a certificate type. You can choose from:
- Single domain SSL certificates: for a single site only.
- Multiple domain SSL certificates: a single certificate that can be used to protect multiple websites (these obviously cost more than single site certificates).
- Wildcard SSL certificates: to include subdomains.
Finally, apply the certificates on your web server by editing your Apache virtual host configuration (and restarting Apache).
<VirtualHost 192.168.0.1:443>
DocumentRoot /var/www/html2
ServerName www.yourdomain.com
SSLEngine on
SSLCertificateFile /path/to/your_domain_name.crt
SSLCertificateKeyFile /path/to/your_private.key
SSLCertificateChainFile /path/to/DigiCertCA.crt
</VirtualHost>
To learn more about training material on all-things security, visit Cloud Academy Security Library or for more an in-depth training on SSL/TLS best practices, take a look at Best Practices for Deploying SSL/TLS hands-on Lab.


