![]()
Most mobile developers working on an app are likely to encounter a common problem: how to write backend services. Achieving a solid architecture that allows the service to scale correctly (with minimal downtime) requires solid knowledge in backend technologies. Without it, you’re likely to waste a lot of time and money.
Mobile backend as a Service (MBaaS) has been a real lifesaver for the mobile developer. With MBaaS, a developer can take a few lines of code and some tuning and use services like real-time database, storage, and authentication without having to know how they work. In this post, I’d like to answer the question ‘What is Firebase?, the platform that solved my mobile app development issues. It’s basically Serverless for mobile. Today, I’ll walk you through an overview of the platform and show you how to use it to create a useable mobile chat app.
What is Firebase?
Firebase is a mobile and web application development platform. According to Wikipedia, the initial Firebase product was a “real-time database, which provides an API that allows developers to store and sync data across multiple clients.” The company was founded in 2011 by Andrew Lee and James Tamplin and acquired by Google in 2014. In 2016, Firebase announced that it was “expanding to become a unified app platform for Android, iOS, and mobile web development.”
Currently, Firebase is an all-encompassing product that has everything I needed to develop the app (storage, authorization, realtime database, and push notification system). For the purposes of my project, I will combine these services to create a usable chat application that is ready to scale based on users.
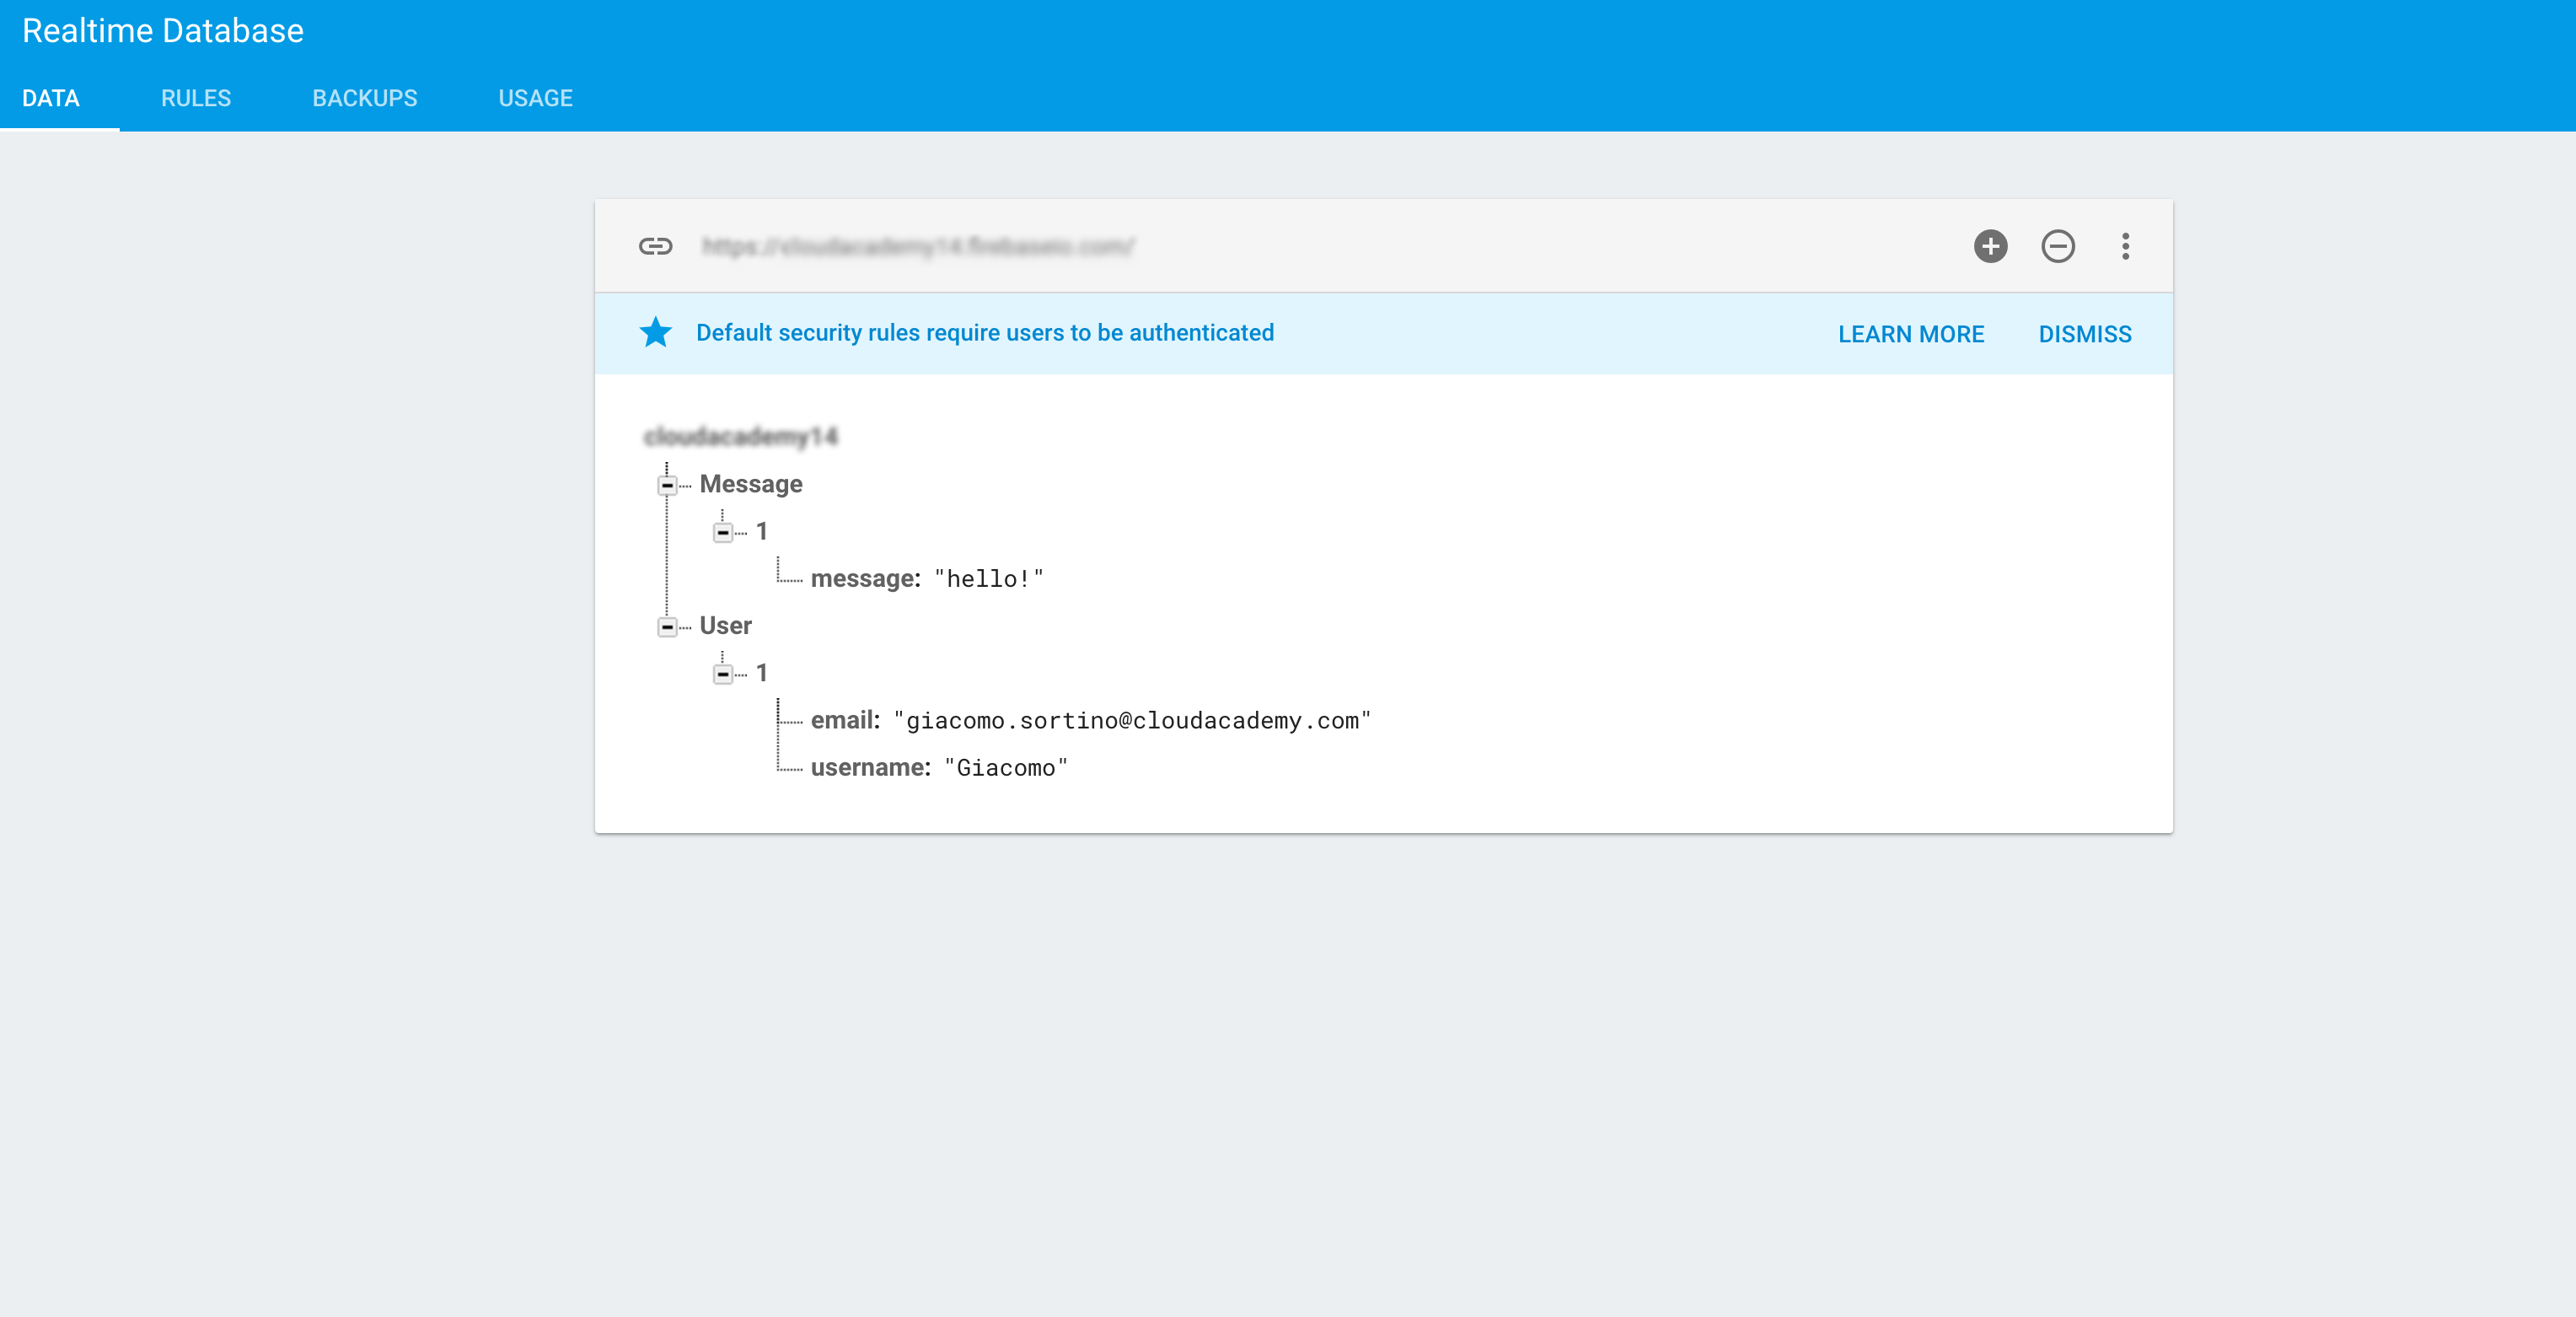
What is a real-time database?
A real-time database is a schemaless database in which the data is stored in JSON format. It is optimized for offline use due to the persistence of local data on the device and automatically synchronizes from SDK. By default, only authenticated users have read/write access but this can be made public through the configuration.
Step 1: Configure project
To add the Firebase database, you have to insert your Android App project into the Gradle file:
compile 'com.google.firebase:firebase-database:10.0.1'
Step 2: Write data
With the API offered from SDK, you can easily write into the database:
// Write a message to the database
FirebaseDatabase database = FirebaseDatabase.getInstance();
DatabaseReference myRef = database.getReference("message");
myRef.setValue("Hello, World!");
Step 3: Read data
A Firebase Database is different from a common SQL database. To access the data written inside the Firebase database, it has to “listen” to the key we want to read and which must be notified of the changes. This is the key part of this tool: the real-time communication of data. This opens up a wide range of applications that (like chat apps), using common databases, we should implement from scratch with different tools and work hour.
myRef.addValueEventListener(new ValueEventListener() {
    @Override
    public void onDataChange(DataSnapshot dataSnapshot) {
        // This method is called once with the initial value and again
        // whenever data at this location is updated.
        String value = dataSnapshot.getValue(String.class);
        Log.d(TAG, "Value is: " + value);
    }
    @Override
    public void onCancelled(DatabaseError error) {
        // Failed to read value
        Log.w(TAG, "Failed to read value.", error.toException());
    }
});
Authentication
With a little effort, we will have a tool for identifying and storing users with all of the major OAuth systems available today.
Step 1: Configure project
In order to add the Firebase Auth, you have to insert the following into the Gradle file of your Android App project:
compile 'com.google.firebase:firebase-auth:10.0.1'
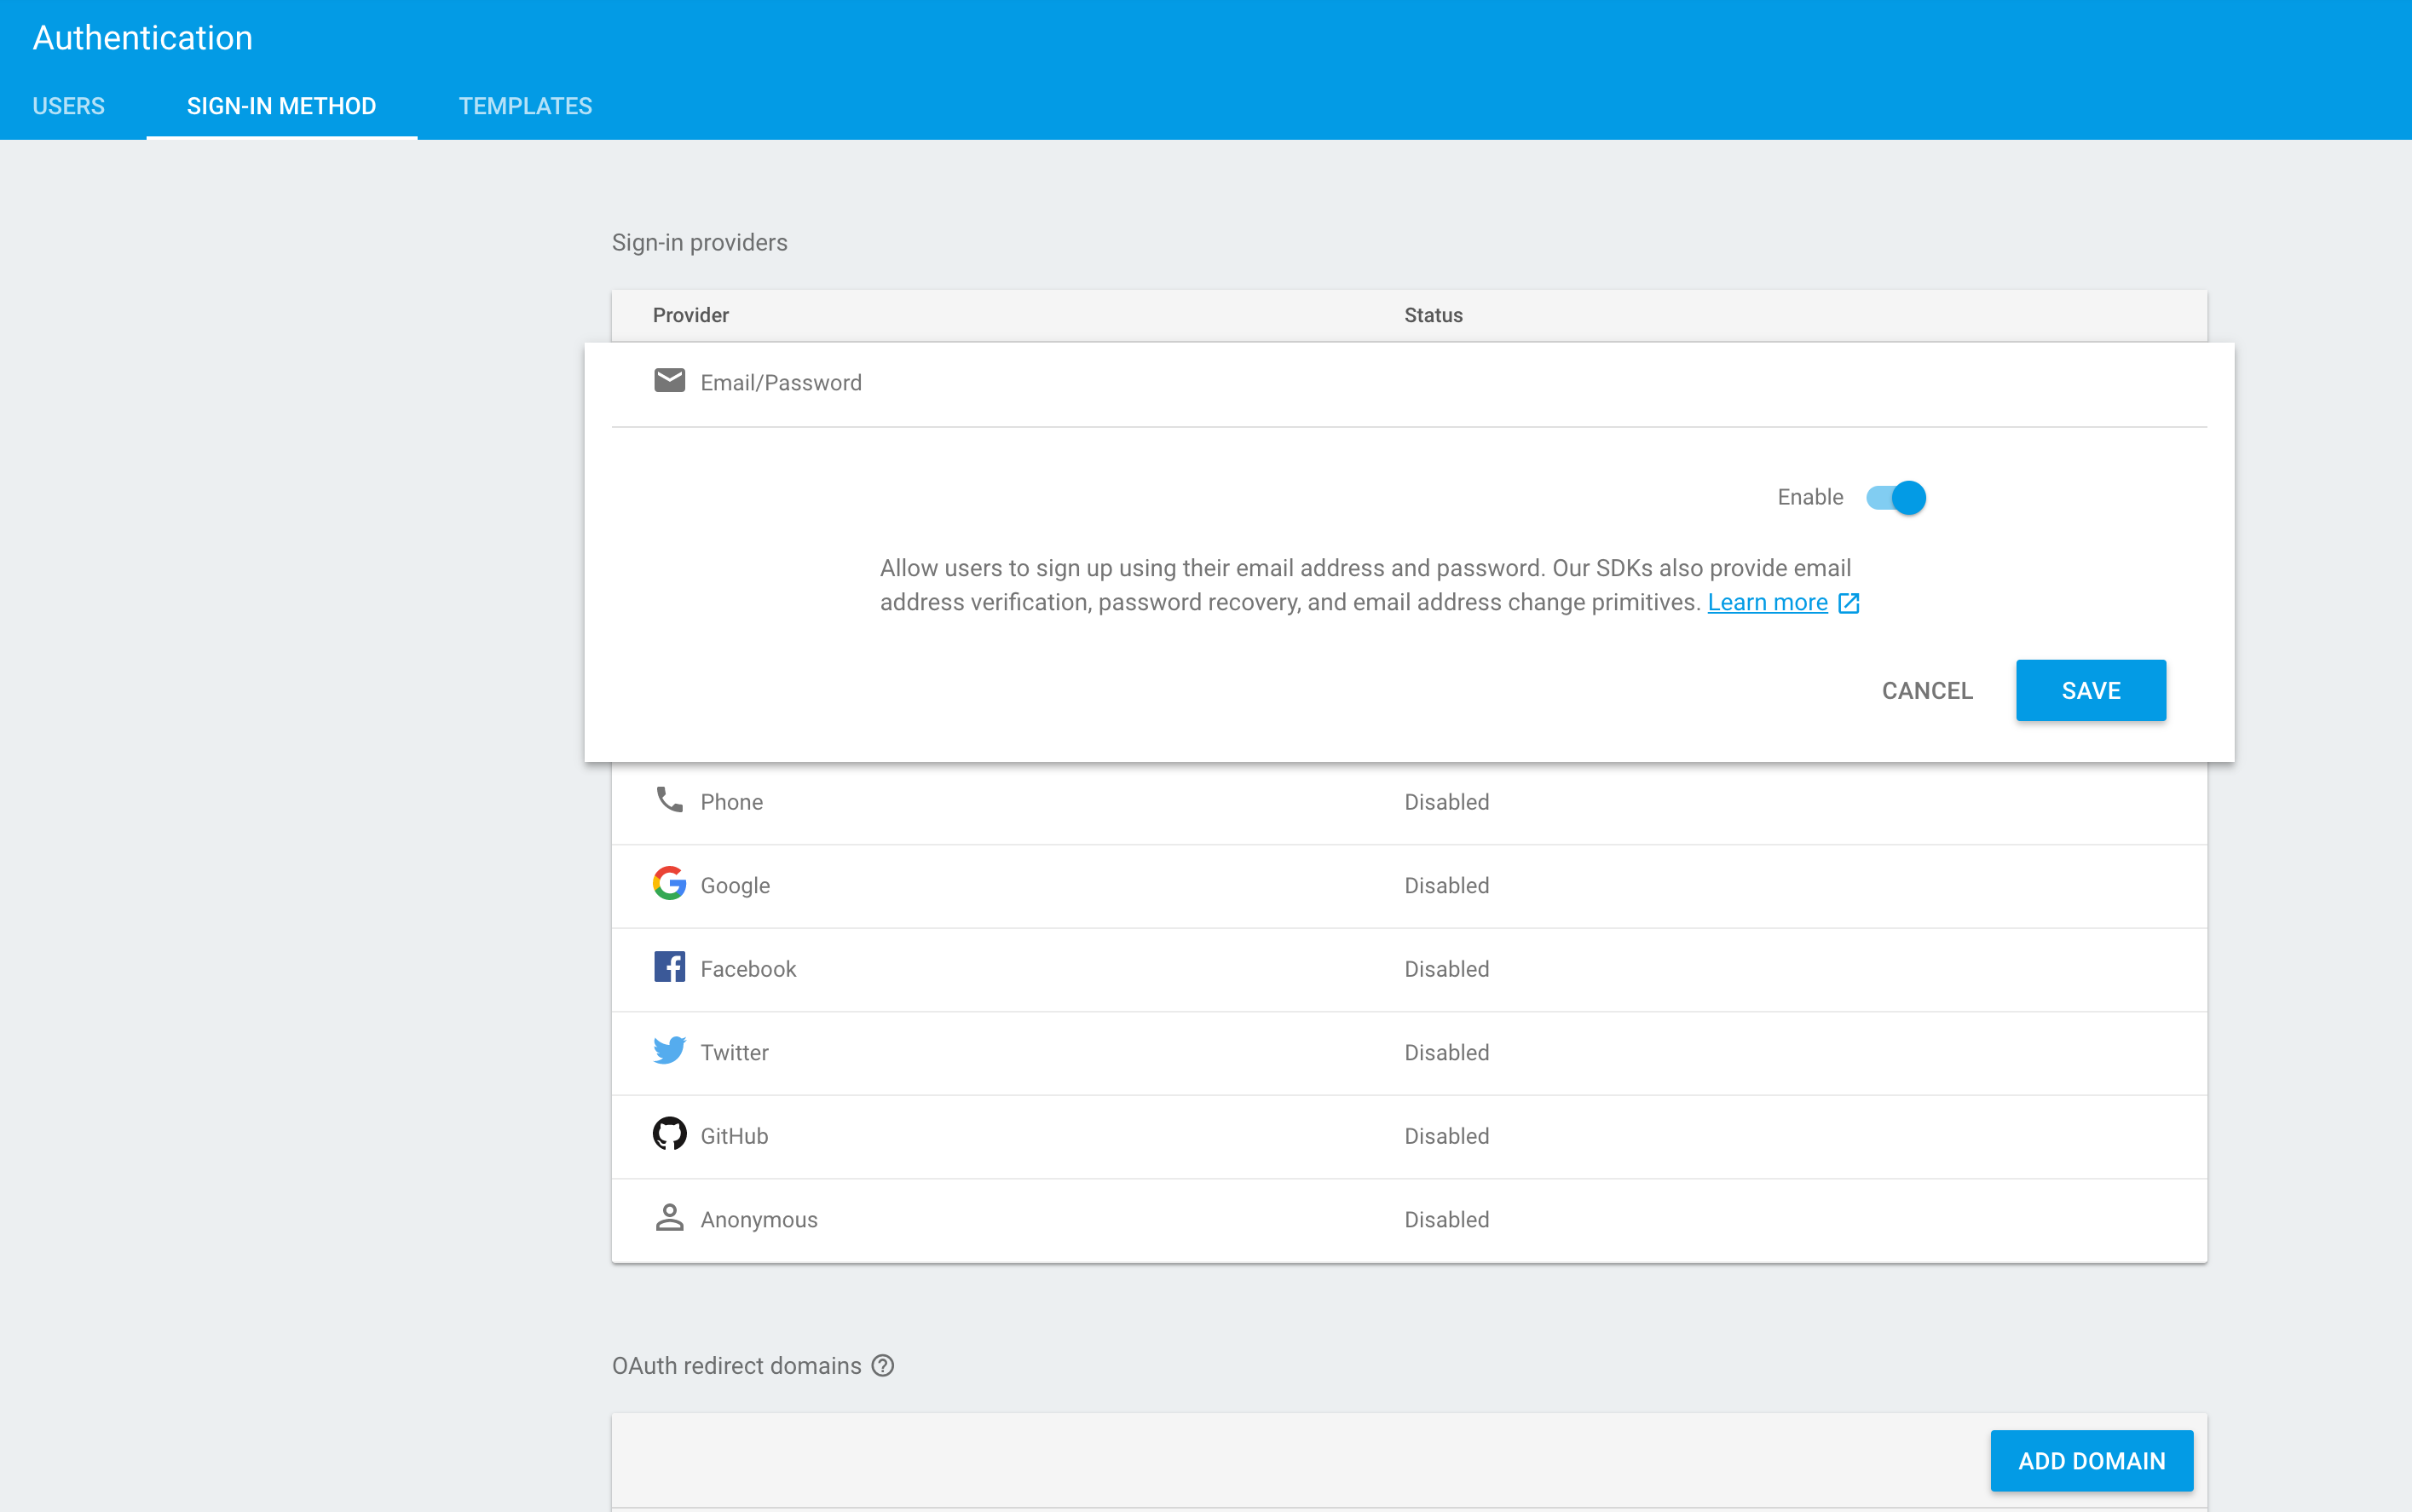
Step 2: Enable provider
Step 3: Add code to our application
Next, with a few lines of code, you will have successfully added a registration with user and email into the app, without touching anything:
mAuth.createUserWithEmailAndPassword(email, password)
        .addOnCompleteListener(this, new OnCompleteListener<AuthResult>() {
            @Override
            public void onComplete(@NonNull Task<AuthResult> task) {
                Log.d(TAG, "createUserWithEmail:onComplete:" + task.isSuccessful());
                // If sign in fails, display a message to the user. If sign in succeeds
                // the auth state listener will be notified and logic to handle the
                // signed in user can be handled in the listener.
                if (!task.isSuccessful()) {
                    Toast.makeText(EmailPasswordActivity.this, R.string.auth_failed,
                            Toast.LENGTH_SHORT).show();
                }
                // ...
            }
        });
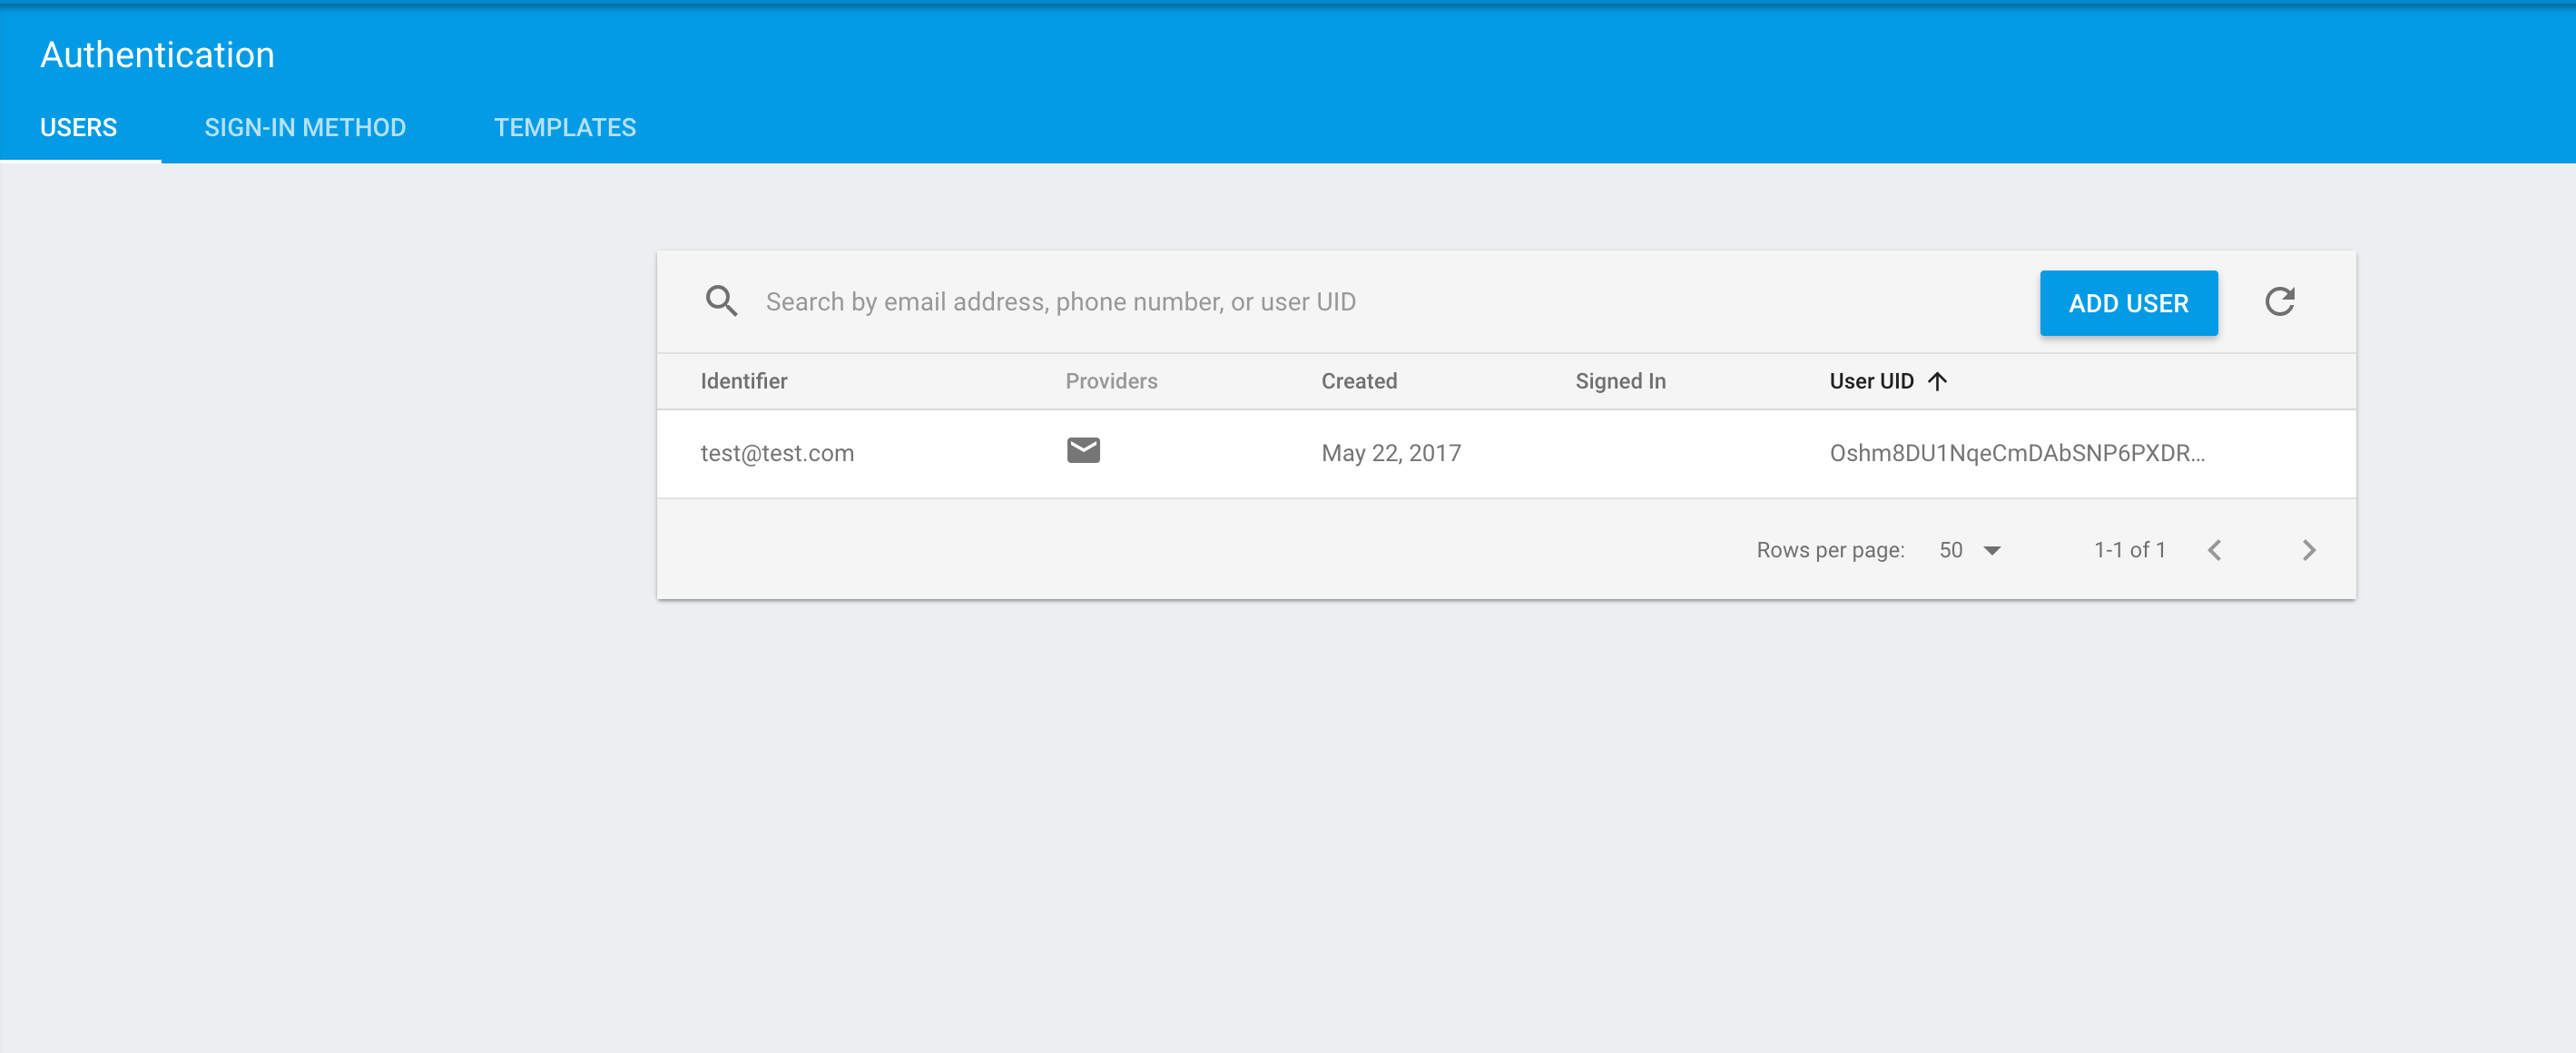
Step 4: View registered users
In the Firebase console, you can see all of the users registered through the implementation of our application. Another useful feature is the email template, which enables communication with the user, such as for sending an email confirmation after registration.
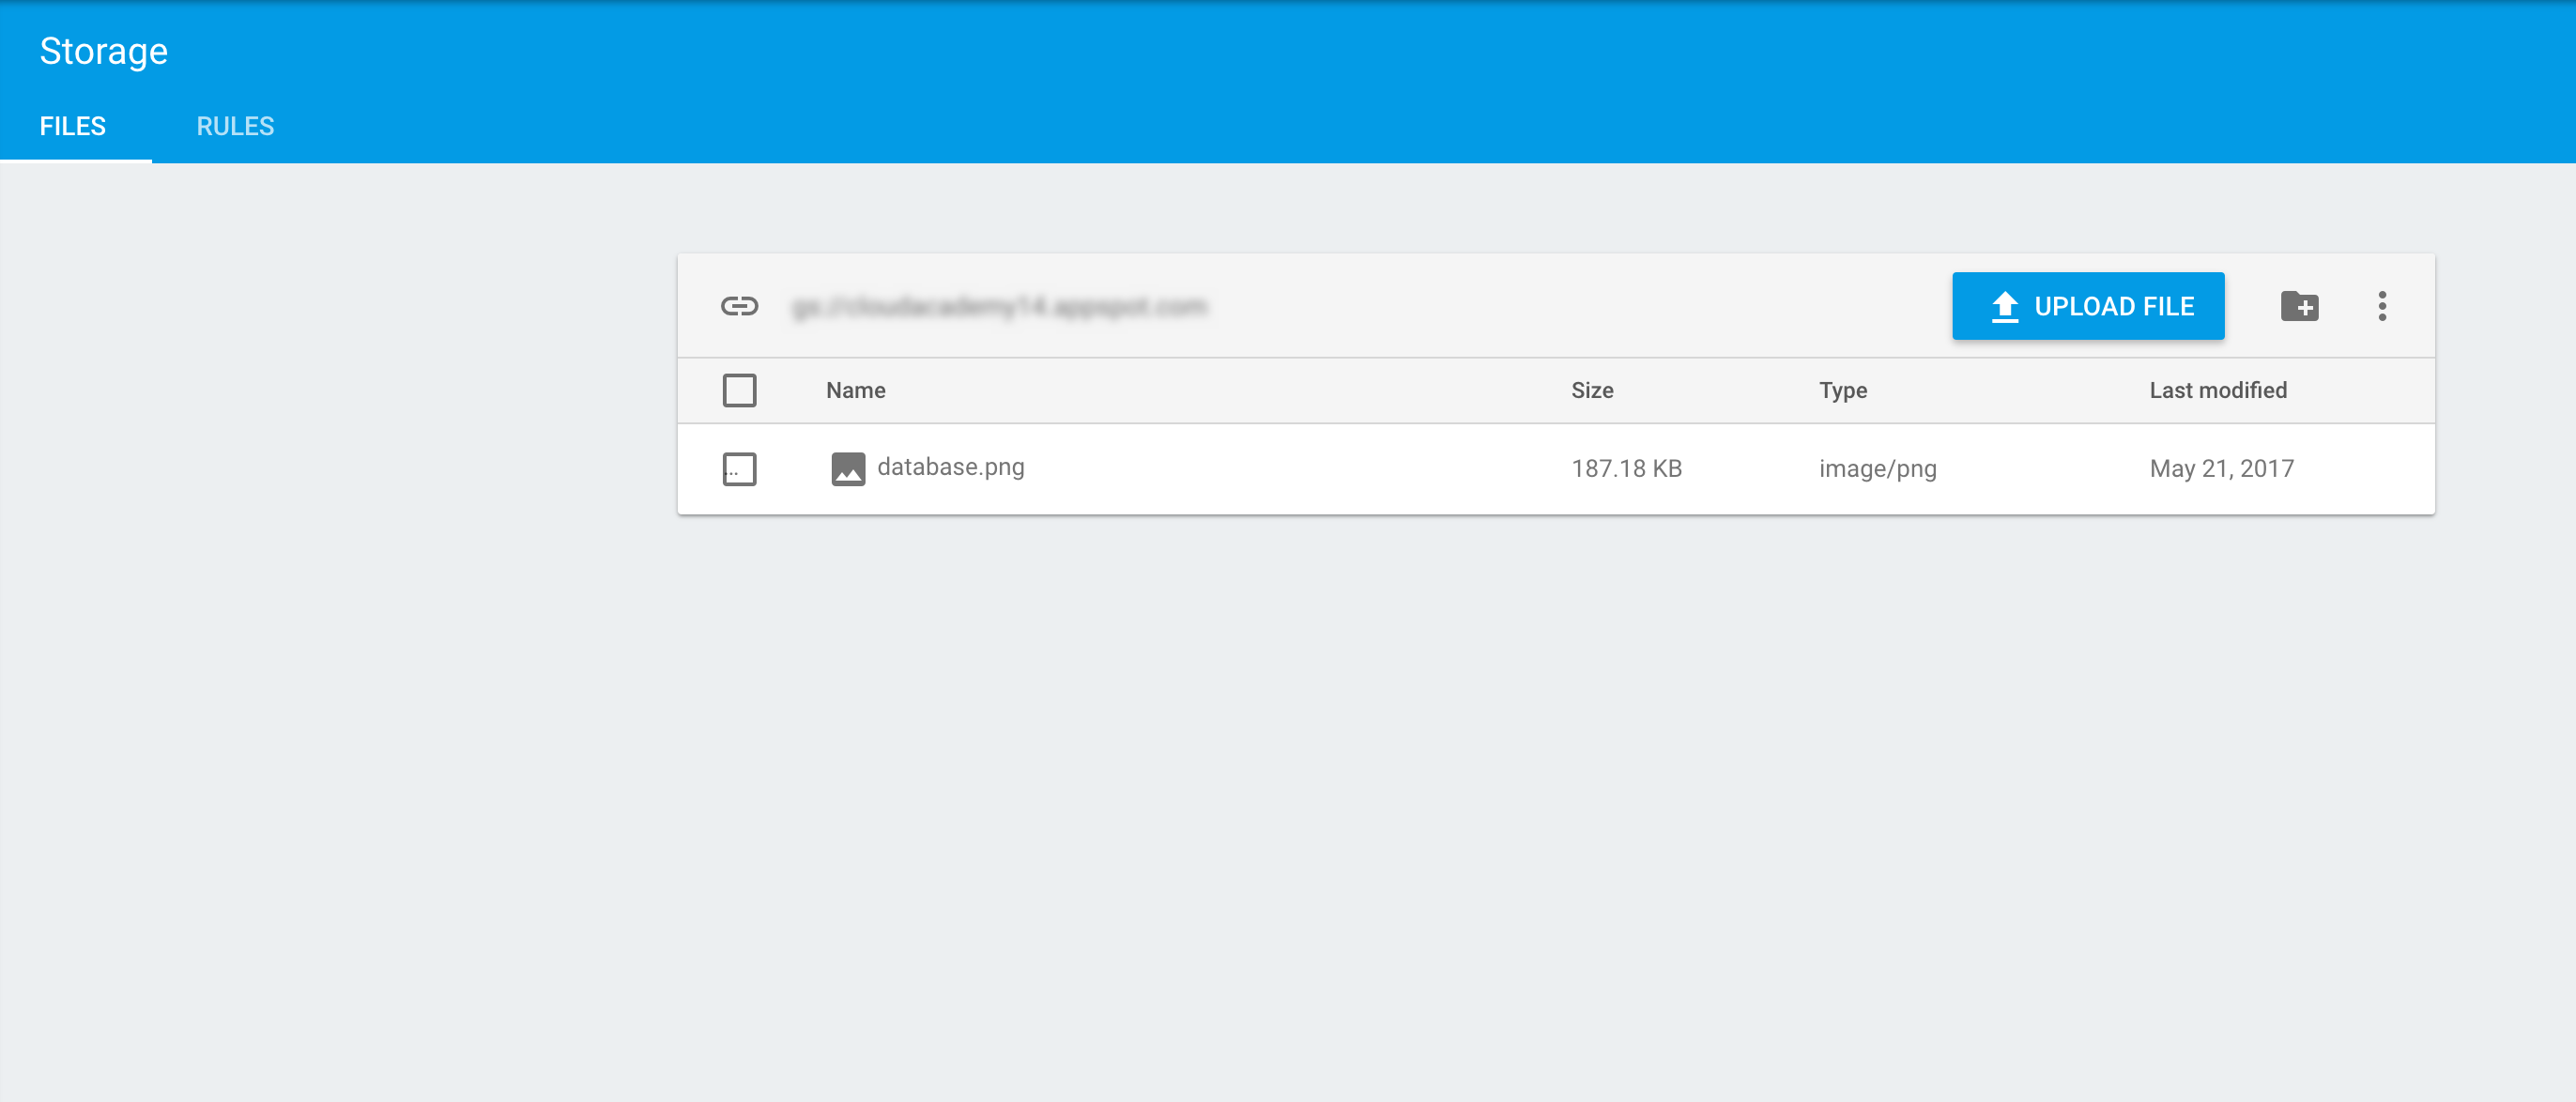
Storage
Firebase will easily allow us to upload and download the files we will use in chat. Like other services, this includes the SDK and rules for content visibility:
Step 1: Configure project
To add the Firebase storage, you will need to insert the following into the Gradle file of your Android App project:
'com.google.firebase:firebase-storage:10.0.1'
Step 2: Upload a file
You can easily upload a file into the bucket of Firebase storage:
Uri file = Uri.fromFile(new File("path/to/images/rivers.jpg"));
StorageReference riversRef = storageRef.child("images/rivers.jpg");
riversRef.putFile(file)
    .addOnSuccessListener(new OnSuccessListener<UploadTask.TaskSnapshot>() {
        @Override
        public void onSuccess(UploadTask.TaskSnapshot taskSnapshot) {
            // Get a URL to the uploaded content
            Uri downloadUrl = taskSnapshot.getDownloadUrl();
        }
    })
    .addOnFailureListener(new OnFailureListener() {
        @Override
        public void onFailure(@NonNull Exception exception) {
            // Handle unsuccessful uploads
            // ...
        }
    });
The implementation of this API also offers the pause/resume function that is very useful in developing mobile applications due to an inconsistent internet connection.
Step 3: Download a file
File localFile = File.createTempFile("images", "jpg");
riversRef.getFile(localFile)
    .addOnSuccessListener(new OnSuccessListener<FileDownloadTask.TaskSnapshot>() {
        @Override
        public void onSuccess(FileDownloadTask.TaskSnapshot taskSnapshot) {
            // Successfully downloaded data to local file
            // ...
        }
    }).addOnFailureListener(new OnFailureListener() {
        @Override
        public void onFailure(@NonNull Exception exception) {
            // Handle failed download
            // ...
        }
    });
Firebase Cloud Messaging
Firebase Cloud Messaging is a multi-platform push notification system that allows us to send messages both via the web platform made available by Firebase or through integration with other services that trigger a push (Google Cloud Functions).
Cloud Functions for Firebase
This is, in my opinion, is one of the best features of Firebase. Cloud Functions for Firebase allows you to “automatically run backend code in response to events triggered by Firebase features and HTTPS requests.” Essentially, it is a piece of code that runs something like “create a thumbnail of an image,” which alone is not very useful, however, you can attach it to the Firebase Storage and set the trigger for calling this function after an image is uploaded to it. After that, the function executes the following steps:
- Get the original image
- Convert it into a thumbnail
- Write the new filename with location to the database
- Upload the new image to storage
- Now, the app sees the thumbnail
Other ways that Cloud Functions can be used:
- Periodically delete unused Firebase accounts
- Automatically moderate uploaded images
- Send bulk email to users
- Periodically aggregate and summarize data
- Process a queue of pending work
Third-party integration
You can also use the Cloud Function with other systems, such as GitHub or Slack, that allow you integrate it into your project. However, this is not included in Firebase’s Free Plan.
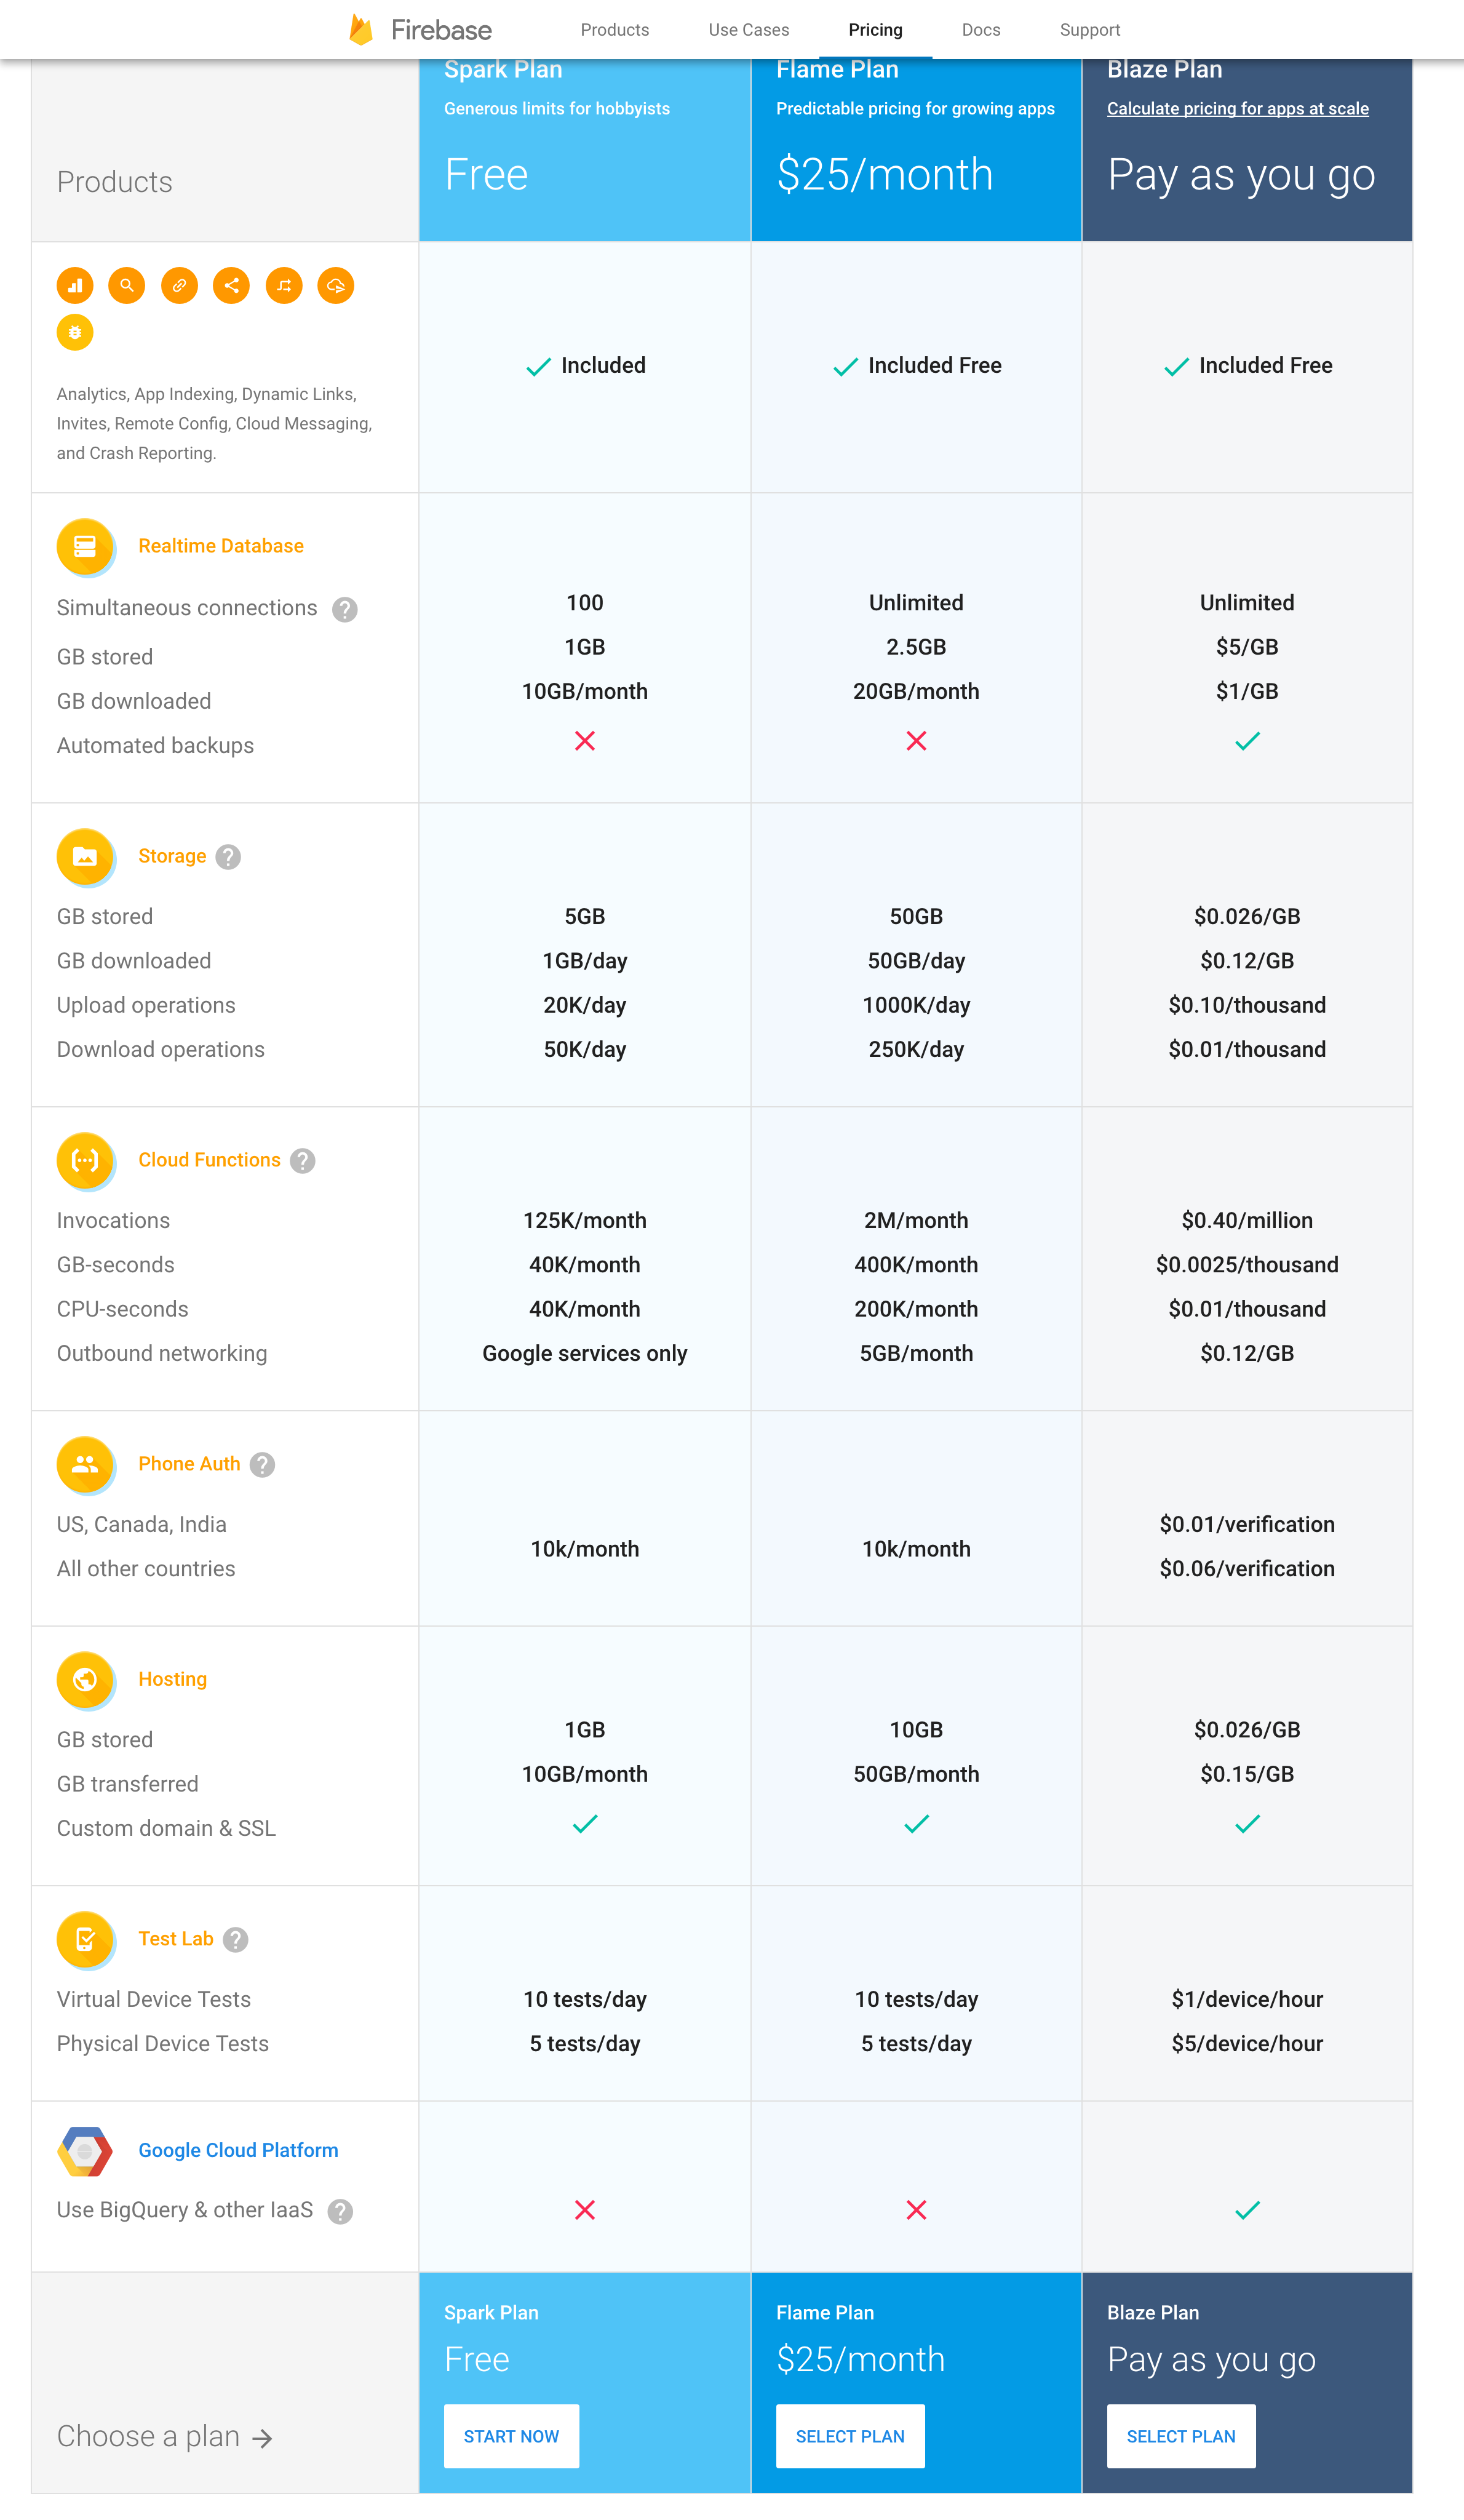
Pricing
Usually at this point comes the painful side note, i.e. the price. But for our experiment today, the cost will be 0 as you can see from the table below:
Conclusion
After exploring the Firebase platform a bit, I can say that it was exactly what I was looking for. It includes everything that my application might need without having to distract too much from the overall mobile development.
Developing this just a few years ago would have been a much different story. Putting together an archive to run photos, a database that would notify me of changes in real time, and a user management system will all the possible integrations plus email confirmation with a customizable template would have required many working hours.
Any service that allows me to focus on the overall idea behind what we’re developing (and less on some of the more technical bits) will definitely have my attention going forward.