![]()
Vagrant with Chef Solo Provisioner for WordPress on AWS’s Ec2
 In this guide we will learn how to bootstrap an Amazon Ec2 WordPress instance, using a shell script, Vagrant, and Chef Solo. By the way, by making some simple changes to provider configurations, this same Vagrant file can be used to bootstrap instances with different cloud providers like Rackspace or OpenStack, or even in local development environments.
Your Situation
- You have developed an application on a local Linux machine that you want to deploy to AWS.
- You might later want to migrate the application to Rackspace or OpenStack
- You want to replicate the test environment to a dev environment
What is Vagrant?
Vagrant is a tool for building complete development environments. Vagrant can be used to create and configure lightweight, reproducible, and portable development environments. Once you have created a Vagrant file, you only need to launch it within Vagrant and everything will load exactly according to your original configuration. Say goodbye to “This won’t work on my machine” bugs.
What makes it better than bare metal or VirtualBox solutions?
The old way of developing web applications was to install and configure all the software (Apache, PHP, Java, Tomcat) you’ll need, either locally on a virtual machine or directly on a development server. Once your software environment is properly installed, it must be configured. Or, if you’re not following best practices, misconfigured; leading to systems that appear to work in development, but might fall over in production. Virtual environments certainly have their advantages, but you’ll still have to manually install the OS and software tools from scratch or, at least, manually clone an existed image. Both approaches take time and are not customizable.
Vagrant allows you to automatically and reliably generate your development environment on any virtual machine, using shell Scripts and configuration management tools like Chef or Puppet.
Vagrant Components
Providers:
Vagrant can be installed on top of VirtualBox/Vmware, or on hosting providers like AWS and Rackpsace. This means we can test our applications on Virtualbox locally, and then deploy them to a cloud vendor. Once Vagrant is installed, simply run something like:
vagrant up — provider=aws
Provisioners
Once we’ve got a virtual machine running a basic copy of Ubuntu, let’s install WordPress. We could just SSH in and install WordPress using apt-get and be on our way, but that misses the point. Instead, we’ll use Vagrant’s built-in support for automated provisioning. Using this feature, Vagrant will install and configure the software using a shell script or configuration management tools. Provisioners can be shell scripts or purpose-built tools like Chef or Puppet. In this scenario, we’ll use Chef and Shell.
The Vagrant File
The primary function of the Vagrant file is to describe the type of machine required for a project, and how to configure and provision such a machine. The configuration syntax of a Vagrant file is Ruby, but you do not need to be a Ruby programmer to work with it.
What is Chef (and Chef Solo)
Here we’ll use Chef and Chef Solo. Chef is a configuration management and automation platform from Opscode that helps you use code to describe your infrastructure. Because your infrastructure is managed with code, it can be automated, tested, and reproduced with ease. The simplest way to use Chef is Chef Solo. It allows you to install, configure, and manage the packages required by your application without the complication of any client and server configuration.
Let’s get started with automating a WordPress installation on an AWS EC2 instance.
1. Installation:
You will need to install your virtual machine provider which, in our case, will be VirtualBox. Vagrant is a breeze to install (if you like, though, you can read through their installation instructions). Essentially, you download the package for your platform and install it in the way you would normally install any software. Once VirtualBox and Vagrant are installed, You can create a project directory and initialize it:
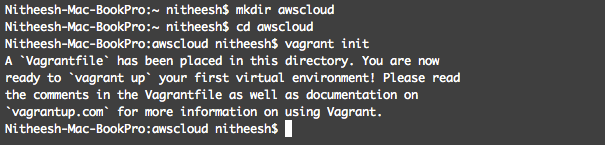
This will create a new directory and prepare a file called Vagrant File containing all the information Vagrant needs to manage your environments.
2. Vagrant AWS Provider installation:
Vagrant-aws is a Vagrant 1.2+ plugin that adds the AWS provider to Vagrant, allowing Vagrant to control and provision machines in EC2 and VPCs. See the documentation for more information.

Now, the quickest way to get started is to actually use a dummy AWS box where you can manually specify all the details within a config.vm.provider block. So first, add the dummy box using any name you want:
vagrantbox add ubuntu https://github.com/mitchellh/vagrant-aws/raw/master/dummy.box
Then edit your Vagrant File so that it looks something like this (filling in your information where necessary).
Vagrant.configure("2") do |config|
  config.vm.box = "ubuntu"
  config.vm.provision :shell, :path => "bootstrap.sh"
  config.vm.provision "chef_solo" do |chef|
  chef.json = {
      :mysql => {
        :server_root_password => 'xxxxxxxxxxxxxxxxxxxxxxxxxxx',
	:server_debian_password => 'xxxxxxxxxxxxxxxxxxxxxxxxxxxxxxxxxx',
	:server_repl_password => 'xxxxxxxxxxxxxxxxxxxxxxxx'
      },
	:phpapp => {
        :db_password => 'xxxxxxxxxxxxxxxxxxxxxxxx',
        :server_name => 'nitheeshp.in’
}
}
chef.cookbooks_path = ["cookbooks", "~/aws/chef-repo/cookbooks"]
	chef.add_recipe("apt")
	chef.add_recipe("phpapp")
   config.vm.provider :aws do |aws, override|
    aws.access_key_id = “xxxxxxxxxxxxxxxxx”
    aws.secret_access_key = "xxxxxxxxxxxxxxxxxxxxxxxxxxxxxxxxxx"
    aws.keypair_name = "nitheesh_windows"
    aws.region = "us-east-1"
    aws.ami = "ami-a73264ce"
    aws.security_groups = "nitheesh_R&D"
    aws.instance_type = "m1.small"
    override.ssh.username = "ubuntu"
    override.ssh.private_key_path = "/Users/nitheesh/nitheesh_windows.pem"
    aws.tags = {
      'Name' => 'wordchef',
     }
   end
  end
end
Download the Bootstrap.sh file:
#!/usr/bin/env bash
sudo -i
curl -L https://www.opscode.com/chef/install.sh | bash
…and place it in your project directory. You should also download the chef-repo and extract it. Now your awscloud project directory should contain three files: VagrantFile, Bootstrap.sh, and the Chef-repo
3. What these files do
a. Vagrant File :
The First block describes configuring our dummy Ubuntu Box.
Vagrant.configure("2") do |config|
 config.vm.box = "ubuntu"
The second block identifies the shell provisioner path.
config.vm.provision :shell, :path => "bootstrap.sh"
The third Block identifies Chef Solo Provisioners, the Cookbook path (in our case, that’s ~/awscloud/chef-repo/cookbooks), and specifies the recipes to execute. You could also specify your json file contents.
config.vm.provision "chef_solo" do |chef|
The fourth block configures the AWS plugin provider
aws.access_key_id = "YOUR KEY”
aws.secret_access_key = "YOUR SECRET KEY”
aws.keypair_name = "KEYPAIR NAME-CHOOSE EXISTING KEYPAIR IN YOUR ACCOUNT“ aws.region = “REGION WHICH YOU WANT LAUNCH THE INSTANCE”
aws.ami = “YOUR AMI ID”
aws.security_groups = “YOUR EXISTING SECURITY GROUPS”
aws.instance_type = “TYPE OF INSTANCE YOU WANTED TO LAUNCH”
override.ssh.username = “LOGIN SSH USERNAME”
override.ssh.private_key_path = “PATH FOR YOUR KEYPAIR PATH”
aws.tags = ‘’TAGS FOR YOUR INSTANCE’
b. Bootstrap.sh
This script will log you into your EC2 instance as root and install chef:
#!/usr/bin/env bash
sudo -i
curl -L https://www.opscode.com/chef/install.sh | bash
c. Chef-repo
This Chef-repo contains our WordPress installation configuration.
Once we’ve uploaded all our files to awscloud directory, it’s time run the vagrant up command. With Vagrant, vagrant up is all it takes to install every dependency a project needs. As promised, you will have a fully running Ubuntu machine with WordPress running on AWS EC2 in just one step.
So, finally, run vagrant up —provider=aws.

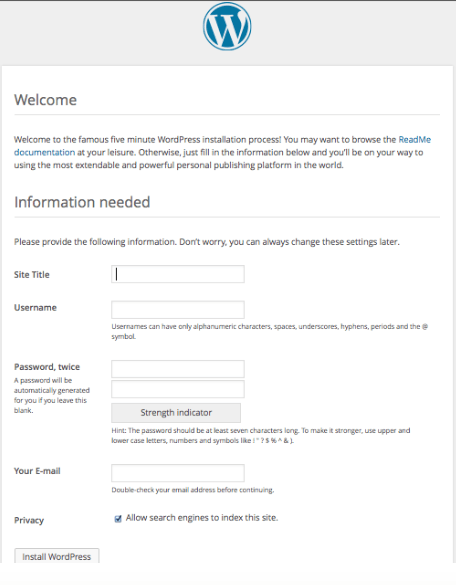
Now you should see the WordPress Configuration page.that
Conclusion
We’ve learned how to provision a Vagrant base box using a shell script and Chef, that will install a LAMP Stack and WordPress. You could also try automating JAVA and a Tomcat Stack.
Good luck!