![]()
In 2016, Amazon Web Services (AWS) launched a new service called Amazon Lightsail. Amazon Lightsail is a flat-rate, low-cost computing solution with easy setup and low maintenance. In the server hosting world, these systems are known as Virtual Private Servers (VPS).
Amazon Lightsail VPS is a scaled-down version of its Elastic Compute Cloud (EC2). For production workloads, EC2 instances require a range of fine-tuning like choosing the right Amazon Machine Image (AMI), placement in a virtual private cloud (VPC), assigning security groups, configuring network interfaces, and so on.
Amazon Lightsail instances don’t need any of these. This ease of set up and operation means that Lightsail instances don’t need to be maintained by dedicated server teams. They are ideal for developers, enthusiasts, and small teams.
In this post, I will show you how to set up an Amazon Lightsail instance and we’ll talk about why Amazon decided to get into the VPS market. In part two of this series, we will compare Amazon Lightsail to an established VPS provider like DigitalOcean.
Amazon Lightsail: Setting up your first instance
Setting up a Lightsail VPS is fairly straightforward. The Lightsail website can be accessed from the AWS console.

In the following images, we are setting up a bare metal Ubuntu server from the main Lightsail console.


There is also an option to create servers from one of the base images. These images provide applications bundled with an operating system so you don’t have to install them manually:

We are not using any launch scripts:

Note that if you want Lightsail to create the SSH key for the instance, you can download the private key only once. You can also upload the public part of an existing SSH key, and Lightsail assumes that you have access to the private key.


We also chose to assign our server 1 GB of RAM, 1 vCPU, and a 30 GB SSD disk with a monthly data transfer rate of 2 TB. The instance will cost is $10 per month (USD). We have named our instance “Test_Ubuntu”:

It takes less than a minute to provision the server, and it will also be assigned a public IP address. Clicking on the three vertical dots on the instance resource will open a menu from where we can stop, restart, delete, connect to, or manage the instance:

The connect option will open a new browser window with SSH access, as shown below:

Selecting Manage from the menu or clicking on the instance name in the dashboard will take us to a different screen:

Clicking on “Connect using SSH” will again open the separate SSH screen in the browser. Most users would want to access the instance with a terminal program like PuTTy or from the OS command prompt. Other tabs of the instance’s property page are used for different purposes:
- Metrics: The performance metrics for Lightsail instances are the same as those available for EC2, only fewer in number. As with CloudWatch metrics, these are available for up to two weeks. The metrics include:
- CPU Utilization (%)
- NetworkIn (incoming bytes received by all network interfaces)
- NetworkOut (outgoing bytes sent by all network interfaces)
- StausCheckFailed_Instance (if the instance VM itself failed AWS connectivity tests)
- StatusCheckFailed_System (if the host containing the instance has a failure)
- StatsuCheckFailed (a combination of StausCheckFailed_Instance and StatusCheckFailed_System)
- Networking: From here, you can check the public and private IP addresses of the instance. As with EC2, rebooting the instance will assign it a new public IP. You can also assign a static IP to the instance.


Users can also create firewall rules for the instance from the Networking tab:

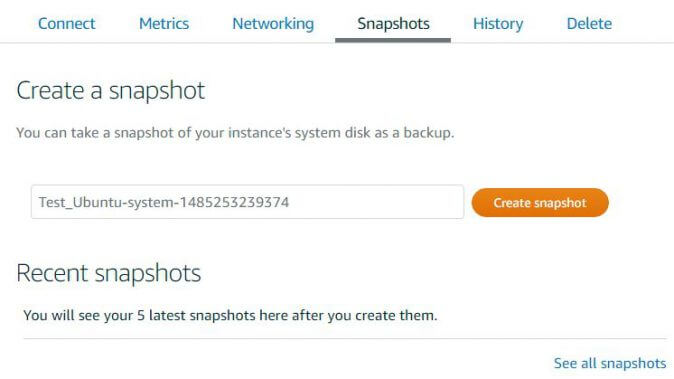
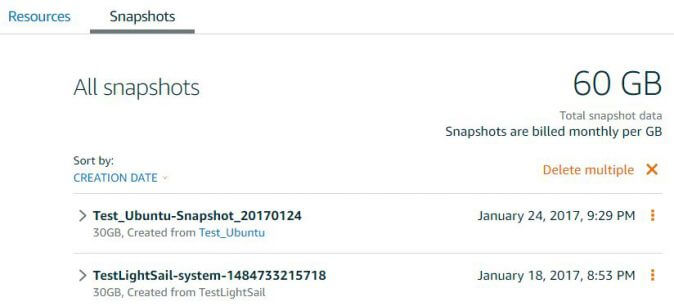
- Snapshot: For virtual servers, snapshots are like a “point in time” copy of the entire instance. This is a common feature in all virtual server environments and Lightsail is no exception. Users can create snapshots of their Lightsail instance from this tab. Snapshots are available even after an instance has been terminated, so you can also recreate the instance later. The Snapshots tab lists the last five snapshots of the instance.

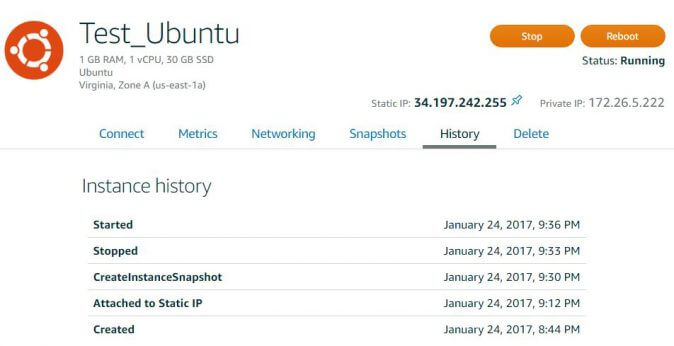
- History: This displays all of the events associated with the Lightsail instance. The image below shows five events: the instance was created, it was assigned a static IP address, and then a snapshot was made. After that, the instance was stopped and started:
- Delete: This tab allows you to delete the instance.
Advanced Features
There are several advanced features available in Lightsail, including the ability to create static IP addresses and DNS zone records.
Static IPs are fixed public IP addresses attached to an instance. The instance keeps the IP even if it’s rebooted. This is ideal for internet facing servers. Static IPs can be detached from an instance and reassigned to another.
For DNS, Lightsail enables you to create A, CNAME, MX, and TXT resource type records for registered domains:


This means that Lightsail customers can take advantage of the AWS Route 53 service to register a domain name and use that for an instance without having to go to a separate provider.
We created a static IP for our Test_Ubuntu server and configured DNS zone records for a domain name. The zone record (A) points to the static IP. The resource screen in Lightsail now looks like this:

Amazon Lightsail instances can connect to other AWS resources. This is made possible when we enable the VPC peering option from the account properties:

Conclusion
This was a very brief introduction to Amazon Lightsail. We find it to be a cheap, user-friendly platform that allows you to rapidly set up infrastructure and deploy applications. However, if you are looking for some extra features from your VPS provider, you may want to shop around to see what other vendors have to offer. This is what we will do in the second part of this series, so stay tuned for Amazon Lightsail, part two.